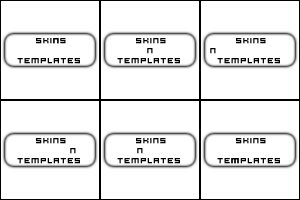
1.Create a new Document the standard 88X31 link button size with a white background.Now Duplicate the layer by right clicking in the layers pallete and selecting Duplicate layer. Now Click the little f on your layers pallete and select stroke, apply a 1 pixel black stroke and change it to inside. Now add some text of your choosing in the center of your button.
 2.
2.Now create a new layer and make a real small selection in the using your rectangle marquee tool in the bottom right hand side of your button. Fill it with white and apply a 1 pixel black stroke on the outside. Thats as far as where gonna go graphic wise just so I can keep it as simple as possible. Now hit your Send to Image Ready Button on the very bottom of your tools pallete. If your unfamiliar with where some of the tools are located please refer to the PS Refrence on the home page.
 3.
3. Now Here comes the fun part! When image ready loads, at the bottom of your screen you should see your Amination,Slice and Image map pallete. If you don't then Select Window>Animation and it should pop up. Ok, now Select the Animation Tab and you should see something similar to the image I have here. Now, Click on the Duplicate Current Frame button located at the bottom of your animation pallete. Now you should have 2 frames and the second frame should be highlighted.
4. Now go over to your layers pallete and click on the small box we made when we were in photoshop. Then on your document Drag the box all the way to the left side of your button. Now go back to your animation pallete and select the tween button. This will pop up a box with your tween options on them. Set it to Tween with Previos Frames and add 20 frames, click ok. If you did this right you should now have 22 frames in your actions pallete. Were getting somewhere now..:)
 5.
5. Now since we want our box to bounce from one side of the button to the other instead of cut off real sharp we have a few more things we need to do. In your acitons pallete select Frame 1 again. Then go to the top right corner of your actions pallete and press the little button and select Copy Frame. Now in your actions pallete select Frame 22 then go back to the top right corner of your actions pallete and select Paste Frame and Select, Paste After selection and press ok. Now, Select Frame 23 and press your tween button again. When the box pops up select 20 Frames and Tween with previous frame. You should now have about 43 Frames.
6.Now, Lets Watch our Movie! Select layer 1 and press play and your box should slide from left to right, Pretty neat huh? Lets Optomize it and save it now. In the top right corner of your screen Select Your Optomize pallete and select GIF 128 Dithered. If you don't see it then go to Window>Optomize. Now go to File>Save Optomized As and MAKE SURE YOU SAVE IT AS A COMPUSERVE GIF FILE (JPEG WILL NOT DISPLAY THE ANIMATION!!!)

Now you know how to do it, why not go back and create a graphically intense button applying these same techniques!


 Now you know how to do it, why not go back and create a graphically intense button applying these same techniques!


