жӣҙж–°ж—¶й—ҙпј� 2006-08-03
еҪ•е…Ҙпј� й»„еҸ¶йЈһжү¬ пј�
1. Create a new image 19x19 and zoom into 800% (zoom in by pressing ctrl and +)
2. Select the circle marquee tool and change its settings to:
Fixed Size
Width: 19px
Height: 19px

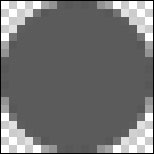
3. Make a circle and fill (edit > fill) it with #5B5B5B
4. Create a new layer
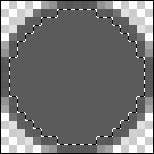
5. Change the circle marqee tools setting to:
width: 17px
height: 17px
6. Make a circle selection in the middle of the last circle.
7. On your pallete, change the first color to #FFF752 and the second to #EFB521.

8. Using the linear gradient, fill the circle selection from top-left to bottom-right. (see picture below)
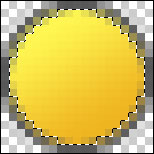
Good! You just made the base for your smiley! Now time to draw the face!
On MSN smilies, their are some set rules of colors to follow:
lips: #BF7120
pupils: #521808
eye outline: #77651A
If you follow these color guidelines, you will be fine!
For this tutorial, we will be making a smiling emoticon!
1. First we will make the eye outlines. Zoom in to 1600% (zoom in by pressing ctrl and +) Create a new layer.
2. Select your circle marqee tool and set it to:
Fixed Size
Width: 4px
Height: 6px
3. change the foreground color on the color palette to #77651A
4. select and fill two circles with #77651A
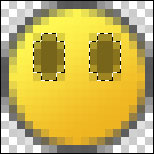
5. Change the foreground color to #521808, the color of the pupils.
6. Select the pencil tool and draw the pupils in the eye outlines
7. Color the rest of the eye (inside the eye outline) with white.

8. Change your foreground color to #BF7120
9. Using the pencil, draw a mouth like the picture
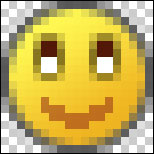
10. Save your emoticon as a .Gif.


