|
In this tutorial, I'll just give you some basic about adding textures to skin and some basic tips.
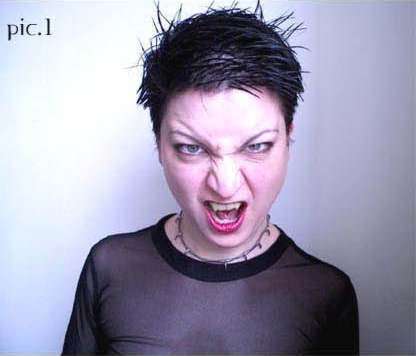
Image courtesy of Tinderstock.
|
|
1) Ok, first you gotta get you picture (pic.1.)
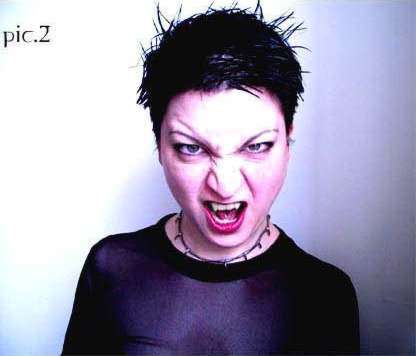
Now , go to Image - Adjustments - Brightness/Contrast and then higher the contrast to +35. Mess around with the setting to your liking or to get something close to (pic.2.)
| |
|
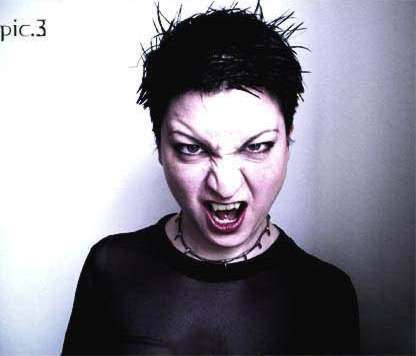
2) The saturation is too high so to lower it down with to hue/saturation to your liking
or get it close to (pic.3.) Add some depth to your image (Image>Adjustments-curves
and make some changes until you like it.
| |
|
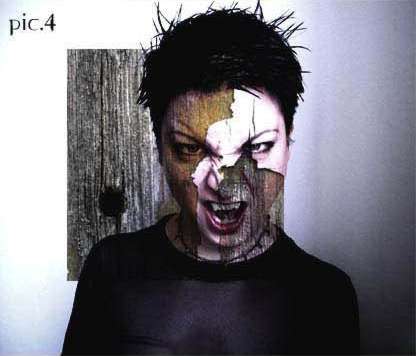
3) Textures time! Choose a texutre you like on a seperate layer, change the blending mode to Multiply then resize and distort your texture to your taste. In this case I just re-sized it to 50% or 60% from it's actual size. I also applied same setting as step 3 (curves, brightness/contrast, hue/saturation)
| |
|
| |
|
| |
|
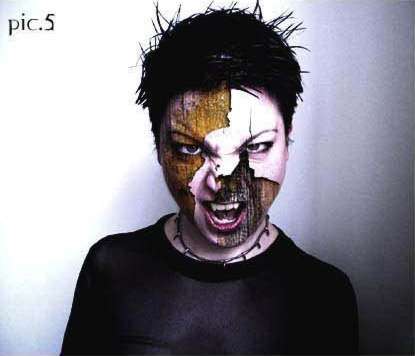
4) In this step we erase the unwanted "areas" of our texture. First select the texture layer and click add layer mask button...you'll see now that a white rectangle appeared next to the layer image. This is where we will "remove" the unwanted areas. Pick up a brush and set the foreground color as black, then start brushing the areas you want to remove. The layer mask button is very usefull, cause it lets you to erase things more safely, cause if you want to "un-erase" an area of your picture, you just need to brush the black areas with white :) the size and hardness of the brush is upto you. I usually use a soft brush. See now if it looks similar to (pic.5.)
| |
|
| |
|
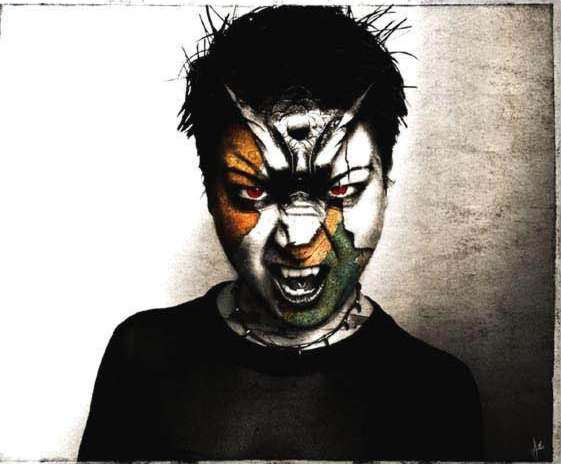
5) Last step, here's how I finished this piece. You'll see that I used much like the same techniques shown up there I erased part of the other texture, and added this orange-green one, using the same techniques I applied to the other texture. I added a texture on the neck too. I turned the eyes to red by creating a new layer setting it to color mode and brushing the eys with a red tone. I also added a photo of a mask, changed the blending to hard light and applied the setting of step 3. (contrast,curves, layer mask, erasing) I ended up with an interesting tinder's forehead :) I
I also desaturated the girl picture, to give a better look and to make the eyes stand out more. To finish things up I picked up an old photo frame picture and set it on overlay mode.
| |
|
| |
| TIPS!
Well, you just read the basic Now its time to you to use your imagination, like adding more textures, images for a perfect collage. Here's some things of what I usually do:
When choosing textures, you have to see what do you want from that texture, if it's a) the colors of it or b) the "shapes" of it (like crackings, relief, and stuff). When choosing a) watch out when you high up the contrast, try not making the saturation too high, so it wont look much realistic. When choosing b) remember to make the saturation low and the contrast high. Plus, always use the burn tool on the darker areas and on the shadows to give more depth.This is very important step, and its applied either to (a) or (b). I personally like color contrast a lot. A good hint is to desaturate most part of your piece and leave only a few things with color. This works well specially on eye manupulation. Try to be original don't stick to just adding textures...it will end up too random. Try adding objects or even rendering of some 3d shapes mix them up.
| |
|
| |
|
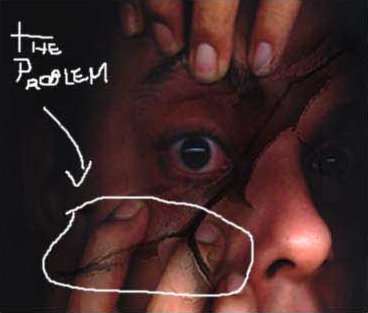
Also watch out for some mistakes:
This is a very common one, I call it continuity problem... Look at this manipulation. There's a problem with it, do you know where it is? look at the image on the left where I drew the And thats not physicaly correct. Solution: do (on the tecture layer) some burning on the contours of the fingers. Or you can just erase the crackings on the fingers area :)
So, there you go...I hope you find this somehow usefull, I know I'm not very organized, but I hope you dont get too confused...I just tried to give you some basics and also give some usefull tips...the walkthrough is just to help illustrating it :) and sorry for the bad english.
|