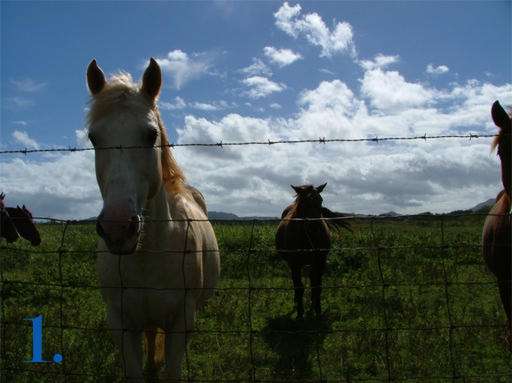
The sky is pretty, but the foreground is so dark, I can hardly see those beautifull horses!:
|
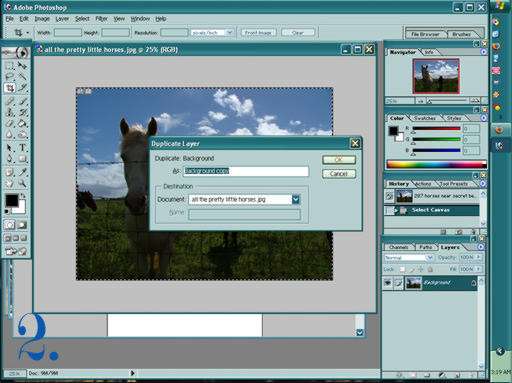
| 1. Open your picture. |
|
|
|
|
| 2. Duplicate the background layer |
|
|
| |
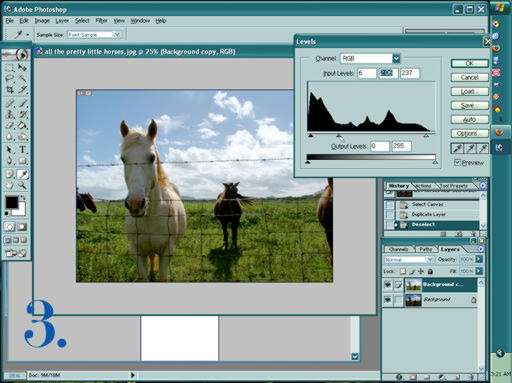
| 3. Adjust the levels of your new layer Brighten the image untill the dark parts look okay. I'm not worrying about how light the sky is getting. |
|
|
| |
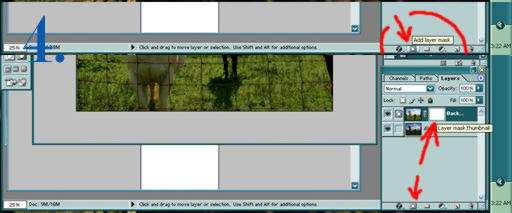
| 4. Add a layer mask to the bright level. It's between the 'f' and the folder in the layers window. |
|
|
| |
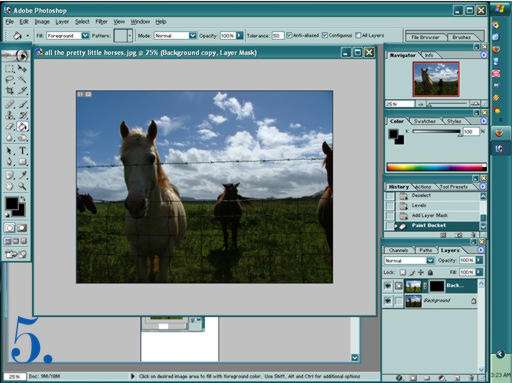
| 5. Fill your new layer mask with black. The bright image will disappear to your original look. |
|
|
| |
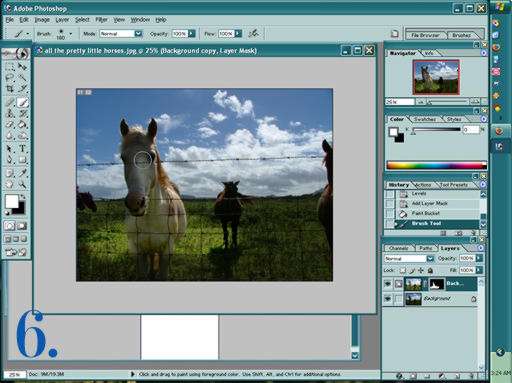
| 6. Set the brush tool on white and start painting where you would like to lighten the image. The brightened layer shows through. Continue painting and use black if you mess up. |
|
|
| |
| 7. Now the foreground is lightened. You can stop here, but I will continue to tweak my image. |
|
|
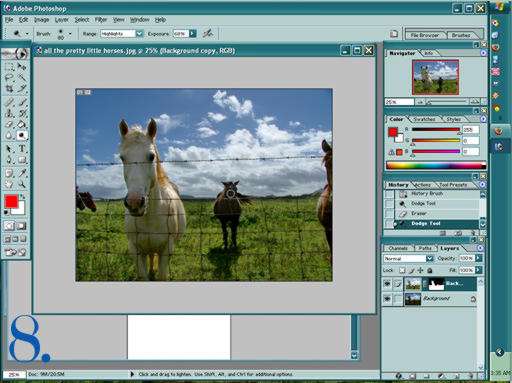
| 8. My brown horses didn't get lightened very much, so I will use the dodge tool to make them a little more visible. |
|
|
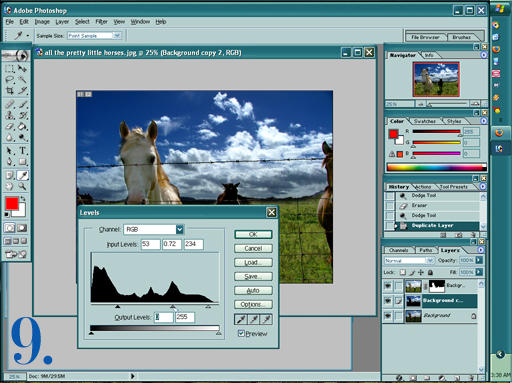
| 9. To liven up the sky, I duplicated the original layer and adjusted the levels and contrast. Then , to make sure it wasn't too big a change, I altered the opacity levels for this new layer. |
|
|
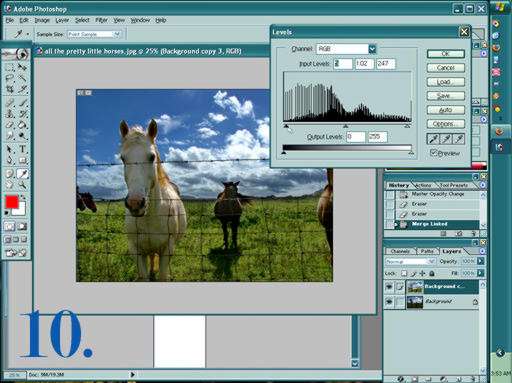
| 10. One final adjustment of levels over all my image and I'm done. Now the picture is a lot brighter and more interesting to look at. ;) |
|
|
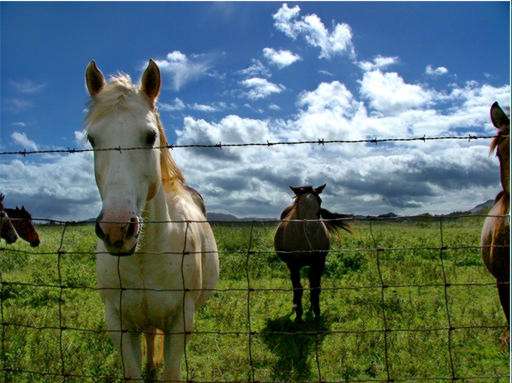
Final Result
|
|
|