Hello. Some people asked me about my way to turn an image into an old one, including the "scratches" that are a standard in my manipulations. Ok, here is the tutorial that answered that question... I hope. Remember, I show you here merely references values, not specific rules. You can change it, depending of your own way to work and likes... Here we go!
 |
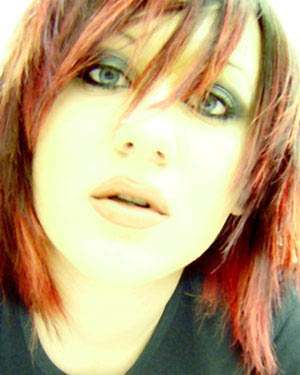
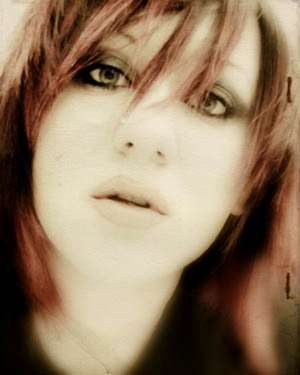
1.
First at all, choose a picture:
We're going to work with We changed the size, creating a "zoom" in the face. |
| |
|
 |
2.
We apply here Filter>Noise>Dust & Scratches using: Radious: 4 pixels and Threshold: 0
This will help to dissimulate the image's pixelation. |
| |
|
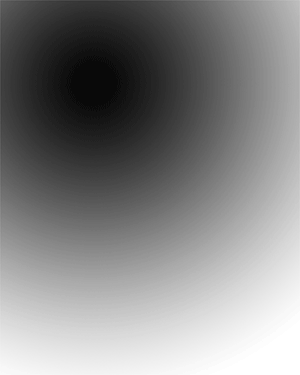 |
3.
Making a copy of this layer, we proceed to apply a blur: Filter>Blur>Gaussian blur... Using 15 pixels. Ok, now click  and add a mask to the layer. Using the radial gradient tool and add a mask to the layer. Using the radial gradient tool  make a gradient in the mask like the image in the left. make a gradient in the mask like the image in the left. |
| |
|
 |
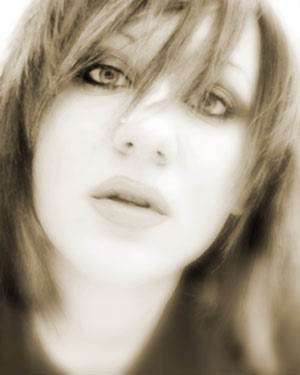
4.
This is the result of merge both layers. |
| |
|
 |
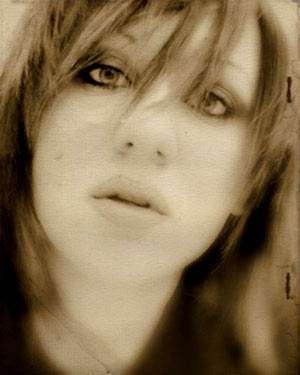
5.
Now clicking in this  icon in the layers palette, select Hue/Saturation and use this values: Hue: 38 Saturation: 22 Lightness: 0 be sure you check the "Colorize" option. Now the image will look like the image in the left. icon in the layers palette, select Hue/Saturation and use this values: Hue: 38 Saturation: 22 Lightness: 0 be sure you check the "Colorize" option. Now the image will look like the image in the left. |
| |
|
 |
6.
Open a texture image copy (Ctrl+C) and paste it (Ctrl+V) into a new layer and set this one to Multiply. |
| |
|
 |
7.
I click again and choose Brightness/Contrast, using: Brightness: -16 and Contrast: +15. |
| |
|
 |
8.
Well... I use a duplicate from the first layer, change the colors using Curves and Selective Color (From the Image>Adjustment menu) and set the layer to Soft light... |
| |
|
 |
9.
...And add a pair of little blurry white circles in the eyes, in a new layer in Overlay mode. |
| |
|
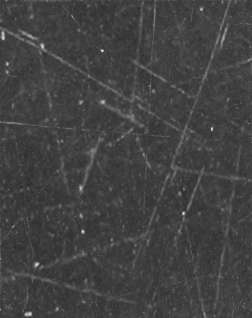 |
10.
Now, save the image scratchtexture.jpg (in the left), open it, select all and hit Edit>Define Pattern |
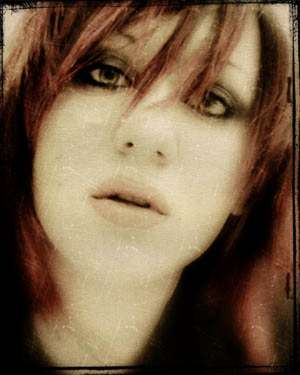 |
11.
Fill a new layer with it, and set this one to Soft light. Add a border and that's finished! An old and beautiful picture. If you want to see this final image wit |


