Pixel World Map
[ 作者来源:tutorialmonkey
编辑整理:
PhotoShop资源网
更新时间: 2006-08-03
录入: 黄叶飞扬 ]
This tutorial will show you how to make a cool world map made from separated pixels.

Step 1
Get a map.The first thing you need to do is get a decent picture of a world map (or individual continents, countries or states if you prefer).
I used a
dingbat font that has, among other things, a world map character. I used
Hong's 2 Dings (
Download ZIP).
If you're using the same dingbat as me, the world map is character "
w".
Step 2
Create a new document and insert mapOpen up a new document with a white background by pressing Ctrl+N (or File> New). I used the default photoshop size.
Insert your map image in black. If your using the Hong's 2 Dings font like me, simply type the character "w" (without the quotes!) and change the font to Hong's 2 Dings. I used size 210pt font.
Step 3
Backup your map and convert to rasterNext, we need to make a copy of the map in case we mess up and need to come back to it!
Locate your layers palette (F7 or click Window> Layers) and select the layer that contains your map. Right click that layer and select "Duplicate Layer".
Then, select the duplicated layer, right-click it and choose "Rasterize Layer".
Finally hide the original layer by clicking the "eye" icon on the layers palette

and make sure that the newly rasterized layer is now selected.
Step 4
Delete lines!
Okay, now for the trickiest part. We need to start deleting lines from this map to get the effect we need.
To start off, locate the "single row marquee" tool from your tools palette:
Make a single row selection at the top of your map, like so:
Okay, now press delete (not backspace) on your keyboard then press the down cursor key twice to nudge the selection area. Then press delete again and press the down cursor twice. Delete again and repeat the process going down the map until you reach the bottom. This will start clearing individual single pixel-height lines from the map.
Once you reach the bottom, you need to now choose the "Single Column Marquee" tool from your tools palette:
Make a single column selection at the extreme left of your map like so:
Okay, now press delete on your keyboard then press the right cursor key twice. Then press delete again and press the right cursor twice. Delete again and repeat the process going across the map until you reach the right extreme. This will start clearing individual single pixel-height width from the map.
Once you reach the right extreme press Ctrl+D on the keyboard to remove the selection marquee. You should have ended up with something like this:
Step 5
Find a suitable image
Ok next,find an image that you'd like to use in this effect. I've used a picture of some commercial buildings.
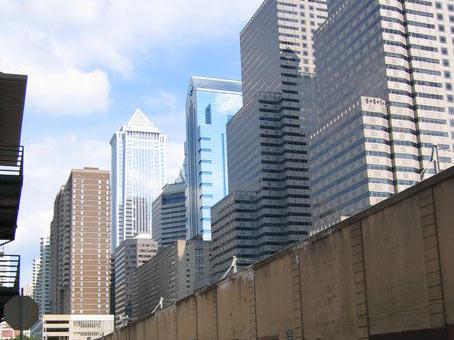
Paste the image as a new layer onto the existing document.
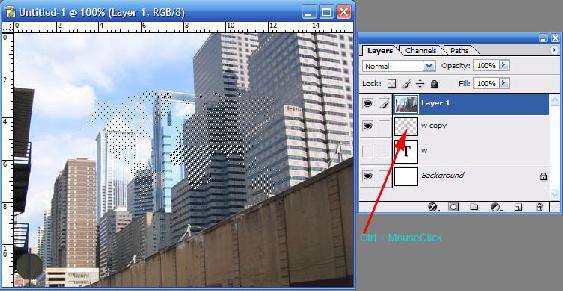
Step 6
Select your pixels
Hold down the Ctrl key on your keyboard and left-click the pixel map layer in your layers pallette. This will make a selection of all your pixels.
Step 7
Create MaskClick the Vector Mask icon on your layers palette. This will create a mask of the buildings picture from the selected pixels.
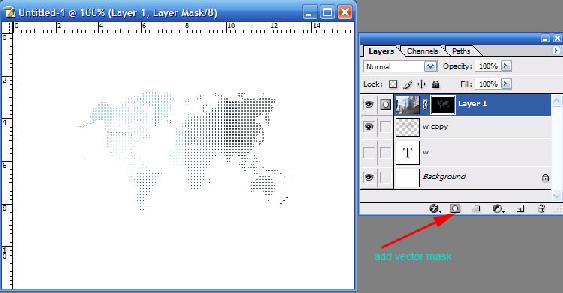
We're almost done..!
Step 8
Add Background ColourNow, select your "Background" Layer in the layer's palette. Press the "D" key on your keyboard which should reset the foreground colour in your tools palette to black (or otherwise select the foreground colour to black manually), then using the fill tool

, fill the background in black, like so:
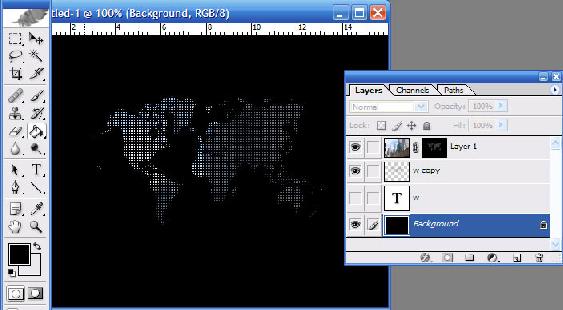
Completed
Add your text if you want, and you're done =)


