In our last installment dealing with brushes in Adobe
Illustrator, we looked at methods for generating Pattern Brushes from vector elements. But this week we'll leave the patterned strokes behind and delve into the messier realm of Art Brushes. These types of brushes differ from Pattern Brushes in that they produce strokes that resemble, in some ways, traditional media, everything from thick, creamy, bristly paints to dry, rough materials. So strap on your smocks. It's going to get sloppy!
Our technique for creating Art Brushes involves three major steps: the creation of the "nib," the conversion of the nib to a brush and the archiving of the brush for future use in any document. We'll cover all the basics, so you shouldn't need a refresher course before we get started. But, if you do want some additional material on Illustrator brushes or, if you're interested in creating Pattern Brushes as well, you can find Part 1 of this tutorial series here.[an error occurred while processing this directive]Creating the 'nib'
All good art brushes begin with a good nib. You can think of the nib as the pattern a bristle brush would create if you were to load it up with paint and press it straight onto your canvas. But instead of bristles, our nib will be composed of small vector objects shaded to produce variations in the stroke. This nib, when applied to a path, will be stretched out to produce the illusion that the paint has been applied with a brush. So what is a "good" nib to use with an Art Brush? The shape of the nib itself is unimportant. The key is complexity. The more complex, the more detailed the object we use for a nib, the more "natural" your brush will look. (Not that there's anything more natural about chemicals synthesized in a lab than pixels displayed on your screen. But you get the idea. We're going for the look of paint here.)
There are several ways to create nibs, of course. One, which I use all the time, is to generate a textured shape in Adobe Photoshop, convert it to vectors in a program like Macromedia Freehand or Creature House Expression and then bring that vector file into Illustrator for use in the brush. But for this tutorial, we'll assume you don't have access to that kind of firepower. So we'll produce everything within Illustrator itself. With this in mind, here's one way to do it.
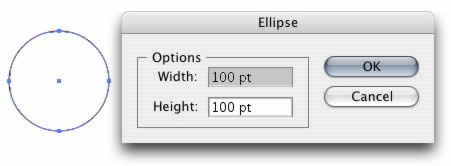
1. Select the Ellipse tool, and tap it on your canvas to call up the Ellipse dialog. Enter width and height values of 100 points.
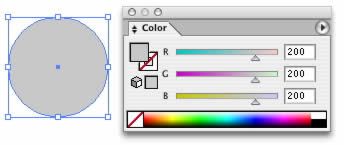
2. Set the fill of the circle you just created to a light gray. Set the stroke to "none."
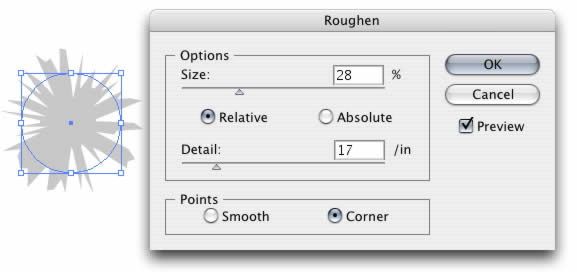
3. With your circle selected, choose Effect > Distort and Transform > Roughen. Set the values to what you see below. (You don't have to be exact about it; just rough the thing up a bit.)
4. Choose Object > Expand Appearance. (This step bakes the Roughen effect onto your object so that it won't be adversely affected by the next step.)
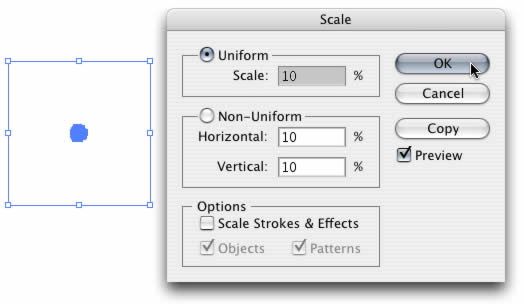
5. Choose Object > Transform > Scale. Set the value to 10 percent.
[an error occurred while processing this directive]
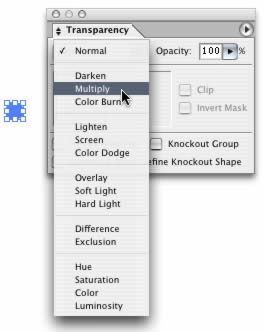
6. In the Transparency palette, set the blending mode to "Multiply."
And that's it for our basic object. Now we need to use it to create our multi-bristled nib.
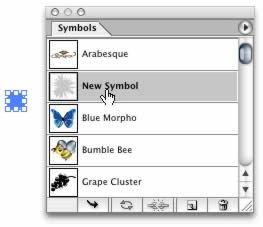
7. Drag your newly created object to the Symbols palette to create a new symbol.
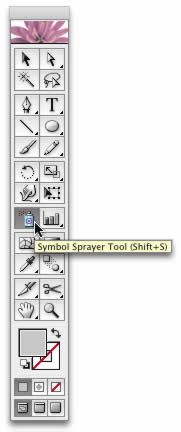
8. In the Tools palette, double-click on the Symbol Sprayer tool.
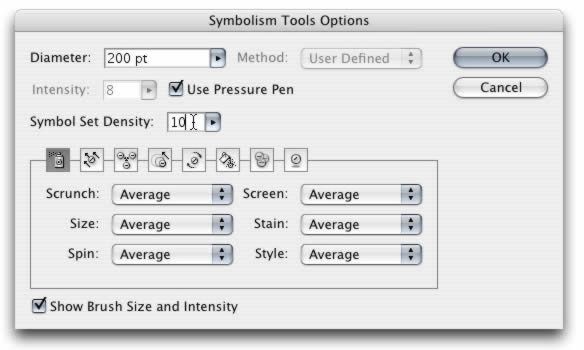
This will call up a dialog for you to adjust the behavior of the Sprayer. We want a fairly dense spray, so use the values you see below.
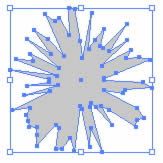
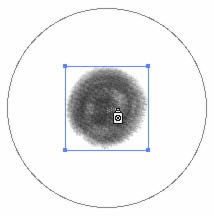
9. Now, making sure you have your newly created symbol selected in the Symbols palette, start spraying. The farther apart you make your symbols when you spray them, the rougher your final brush will look. For this example, I'm going to keep things in a fairly tight circle with just a few strays near the edges.
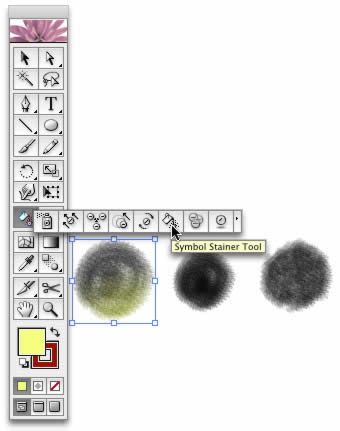
10. You're essentially done with your nib. But, if you wish, you can modify it further to create some additional texture, clumping, randomness or what have you. For example, the Symbol Stainer tool can be used to vary the shade of your group of symbols. Spray it near an edge to get a bit of a gradient effect. (Note that only the luminosity of the stain will matter when we're through. The color itself will have no impact.) You could also use the Symbol Scruncher, which will produce nibs with darker centers, or the Symbol Shifter tool, which will allow you to randomize the arrangement of the elements of your nib. Or you could just try them all out for some variation.
Once again, there are many ways to come up with complex shapes in Illustrator. The method presented above is only one. You should experiment with other methods to come up with your own unique nibs as well. The three important things to remember when doing it are that the objects should be complex; they must be composed entirely of vector objects; and they can't contain any raster effects or gradient fills. The more you experiment with the complete process, the more you'll get a feel for good nib design.
Brush creation
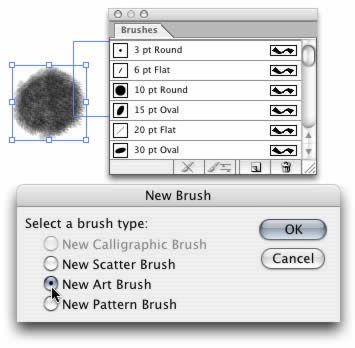
So now you have at least one nib that you think will work pretty well as an Art Brush. It's time for the easy part: converting your nib to a brush. To do this, open up your Brushes palette. [an error occurred while processing this directive]1. Select your group of symbols that you just sprayed onto your canvas, and drag it over to the Brushes palette. A dialog will pop up asking you which kind of brush you'd like to create. Select "New Art Brush," and click "OK."
2. A second dialog box will pop up asking you to select your brush options. It looks more complex than it really is. All you have to do is set the name of the brush and a few other options. "Direction" simply determines which side of the brush will appear at the end of a stroke. (You'd typically set it to "Left to Right.") "Size" sets the scale of the brush. And the "Flip Along" and "Flip Across" options set the orientation of the brush. (I've never felt the need to use any of these options.)
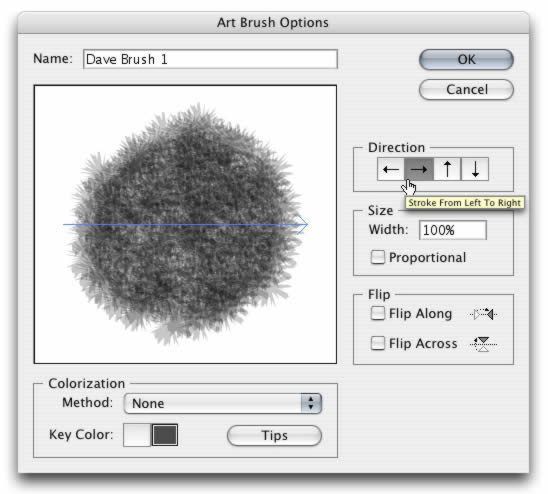
3. Finally, you'll want to set your colorization method. I usually set mine to "Tints & Shades," which allows the brush to accept any stroke color. The "None" option will prevent the brush from being colorized. "Tints" colorizes the brush but retains its original luminosity, which is good for creating dry appearances. And "Hue Shift" shifts the hue and also seems to adjust saturation upward for whatever reason.

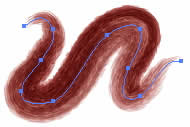
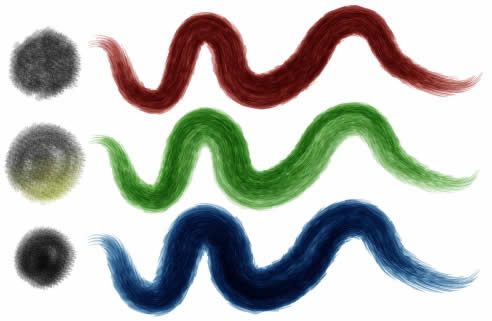
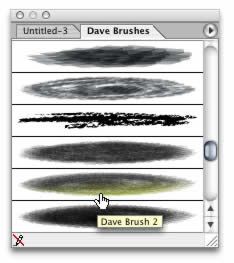
And there you have your very first Art Brush. To use it, simply select the Paint Brush tool, choose your brush from the Brushes palette and draw a stroke. In my case, I have three new Art Brushes, including the versions of my nib I modified using the Symbol tools. (The example below shows the nibs and the resulting strokes.)
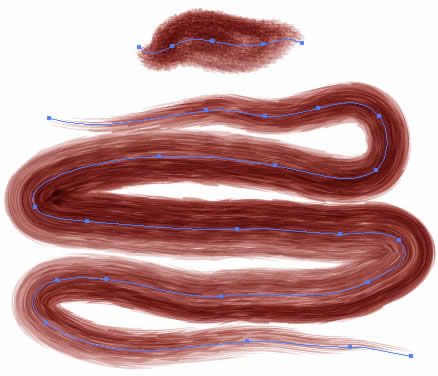
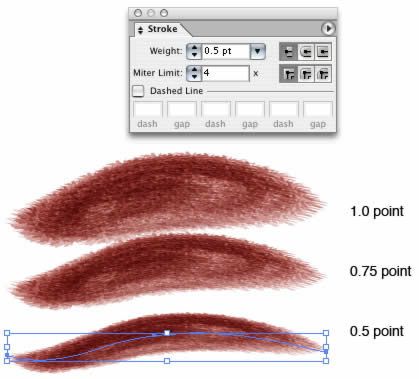
A couple funny things about working with Art Brushes. First, the longer the stroke, the more "bristly" its appearance. This is owing to the fact that Art Brushes are stretched, rather than repeated, along a path. So, for example, here are two examples of one of my brushes, the first applied to a short path, the second to a long path. Same brush, radically different appearance.
affecting the look of the brush is the size of the Stroke you set. With a custom brush, the Stroke value, by default, is set to 1 point. But you can alter this in the Stroke palette to affect the brush's overall size and apparent level of detail. A Stroke size of 0.5 points equates to reducing the size of your nib to 50 percent its original dimensions. A stroke size of 2 points doubles the original nib dimensions. And so on.
Of course, you can also set the scale of the brush at the time of the brush's creation or by double-clicking it in the Brushes palette. Either way works fine.
Archiving the brushes you create
Finally we come to the busywork portion of the lesson. But, again, it's a fairly simple step. In order to be able to use your brushes in the future, you must save them. Unlike brushes in Photoshop, the custom brushes you create in Illustrator are not stored automatically in a general repository that can be accessed by all documents. Instead, you have to save them as a collection manually.
To do this, you first draw a stroke for each individual brush you wish to create. You must apply all strokes to a path. Any that are not applied will be permanently lost.
Next, you save your document that contains all of your strokes. The document is saved as a regular Illustrator file and placed in the following directory: Adobe Illustrator/Presets/Brushes. Now, if you quit and relaunch Illustrator, your new brush collection will be available for all future documents under the Window menu (Window > Brush Libraries > [name of your file].) When selected, it will open up in its own palette.
And that's it. Get painting!