Adobe® Illustrator® provides a vast array of filters and tools that can twirl, tweak, roughen, and otherwise transform an object into something completely different. Start with the simplest of objects — you might be amazed at what you can end up with. In this tip, we'll turn a couple of simple stars into a flower in a few quick steps.

1. Draw a star:
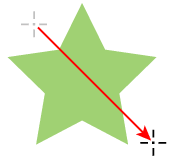
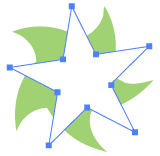
Select the star tool in the Illustrator toolbox, and drag to draw the star. (The star tool is in the same toolbox group as the ellipse tool.) This star will be the leaves behind a flower. Select a green fill for the star in the Swatches palette or Color palette.

2. Twirl the star clockwise:
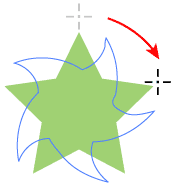
Select the twirl tool, and drag the star clockwise to rotate it. (The twirl tool is in the same group as the rotate tool.)
Twirling rotates an object more sharply at the center than at the edges, distorting the object as it rotates it.

3. Add a second star centered over the first:
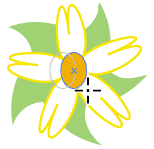
Select the star tool again, hold down Alt (Windows) or Option (Mac OS) to keep the sides of the new star straight, and drag from the center of the first star to create the new star over it. Before releasing the mouse, drag the new star in an arc so that its points appear between the points of the first star.
This star will be the petals of the flower. Select a fill color and a stroke color for the star in the Swatches palette or Color palette. We're using a white fill and yellow stroke in the example.

4. Apply a distortion filter to the second star:
With the second star selected, choose Filter > Distort > Punk & Bloat. Select Preview so you can see the effect while the dialog box is open, and then drag the slider to distort the star the way you want it. Negative values (to -200) apply the Punk filter, and positive values (to 200) apply the Bloat filter. We're using 50 in the example to apply moderate bloating.
Notice that there are two Distort submenus in the Filter menu. We're using the first one, for vector objects; the second submenu is for bitmap images.
Punking moves an object's anchor points outward and curves the object inward from the points. Bloating moves an object's points inward and curves the object outward from them. Play with both effects to see what they can do.

5. Add an ellipse:
Select the ellipse tool, and drag to draw a small ellipse over the flower. Before releasing the mouse, press the spacebar to release the ellipse tool and continue dragging to position the ellipse over the center of the flower.
Select a fill color and None for the stroke color for the ellipse. We're using an orange fill in the example.

6. Shear the finished flower:
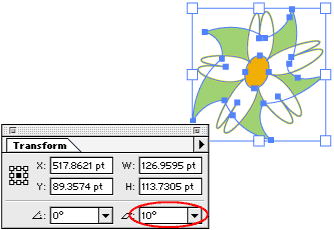
Select the selection tool, Shift-click to select the three parts of the flower, and choose Object > Group to group them together. In the Transform palette, enter a shear angle in the Shear text box, and press Enter or Return. We're using a 10-degree shear in the example. Shearing slants, or skews, an object, which in this case makes the flower look a little more asymmetrical and natural.
The tools and filters we used here are just a sample from a whole panoply that comes with Illustrator. The best way to become expert is to experiment.
