1 In the demonstration let's begin by clicking on the Line Segment tool. Set the stroke weight to 1 pixel. Create a line any length you choose.

2 Click on the Rotate tool. Begin to rotate the line slightly but before letting go of the mouse button, press the Alt key.

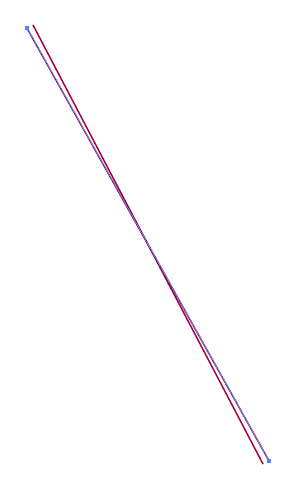
3 You should now have something that appears similar to the lines below.
4 Press Ctrl+D. Continue pressing Ctrl+D until you have something like what appears below.
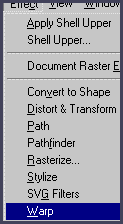
5 With the Direct Selection tool, select all the lines. Press Ctrl+H to see the form better. Let's go to Warp (W). (You may want to Zoom out a little for this.)
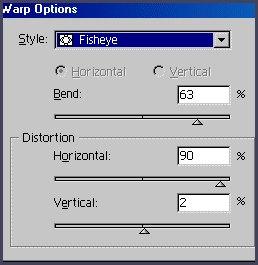
6 Select Fisheye. Choose a Bend percentage to 63%. Under Distortion set Horizontal to 90% and Vertical to 2%.
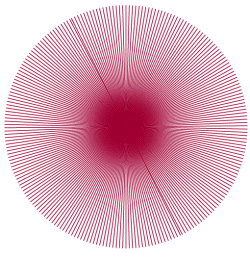
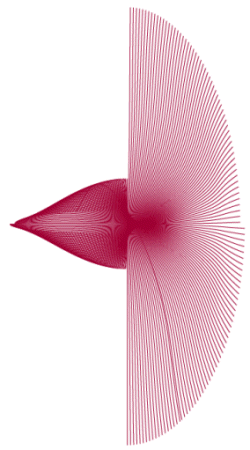
7 Your image should now look like the one below. Select Expand Appearance. If you want to see everything, press Ctrl+H again.
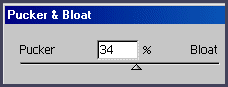
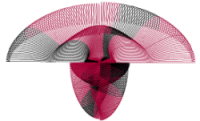
8 Set Pucker & Bloat to 34%. Rotate 90 degrees.
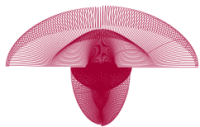
9 This is what we have so far just from starting with one straight line.
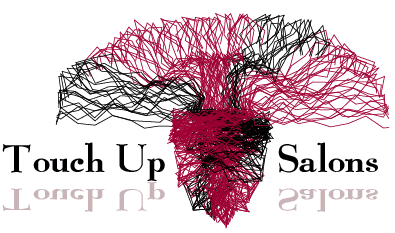
10 Select a few of the strands and change their color.
11 Select Roughen and set Size 5%, Relative, Detail 3, Points Corner.