Do you ever need to combine areas of different layers to construct a composite image? Use an opacity mask in Adobe® Illustrator® to mask an area of a layer to transparency and reveal the layer right below it. You can even apply feathering to the mask to smoothen its edges so the top layer won't look "cut out." Follow along with this tip as we use an opacity mask to place a pink rose on a bed of yellow petals.

1. Open a file with layers:
Open a file in Illustrator that has at least two layers you'd like to blend into one image. Our file has one layer with a yellow rose and another with a pink rose.

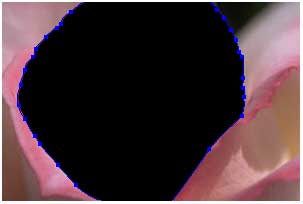
2. Draw a shape over the top layer:
Select a drawing tool, and on the top layer draw a shape to identify the area of the layer you want to retain as foreground. Then fill the shape with black.
We're using the pen tool to draw a precise shape around the edges of our rose, but you can use any drawing tool that suits your needs.
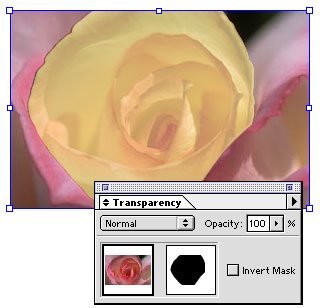
3. Turn the shape into an opacity mask:
Select the selection tool, click the shape (if it's not still selected), and then Shift-click the image. Choose Make Opacity Mask from the Transparency pop-up menu.
The shape becomes an opacity mask for the top layer, revealing part of the layer below. Notice how the layer and mask thumbnails are linked in the Transparency palette.
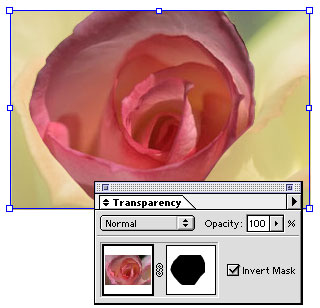
4. Invert the mask:
Select the Invert Mask option in the Transparency palette.
This way, the background of the image (rather than the area you selected) will be transparent. In our example, the yellow petals from the underlying layer show through.
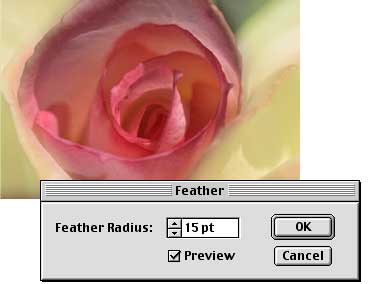
5. Feather the edges of the mask:
Click the mask thumbnail in the Transparency palette to select it. (The thumbnail has a black outline when it's selected.) Then choose Effect > Stylize > Feather, and use 15 for the feather setting.
This softens the transition between the foreground from the top layer and the background from the underlying layer. Now our rose blends in beautifully with its yellow bed.