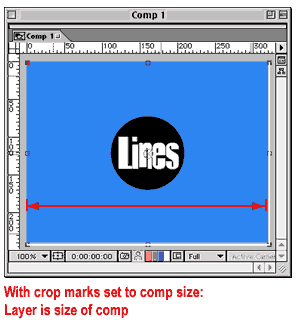
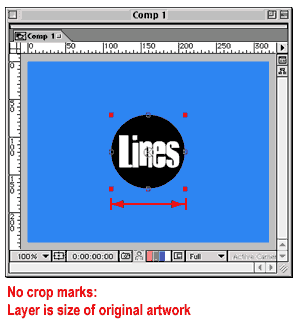
When you import vector artwork into a pixel-based program such as After Effects or Photoshop, its edges are determined by the outmost edges of the art. Sometimes, you want to extend the image area to allow new possibilities in your designs. In this article, Lon Clark demonstrates that by creating crop marks, you define a new edge/size for the file and that can open up new design opportunities.


While crop marks are not always necessary, they can help you avoid some annoying problems, and it’s a good idea to get in the habit of making them. They are important to set when you are importing Illustrator sequences into After Effects in order to keep the correct alignment of your images. Also, certain effects in AE will not affect a layer beyond its bounding size, and by using crop marks, you can avoid having to precompose the layer. In PhotoShop, if you import vector files without crop marks, because PhotoShop rasterizes and anti-aliases the art (slightly expanding it), you can wind up with sharp lines on the edges of your artwork.

So, let's take a look at the procedure:
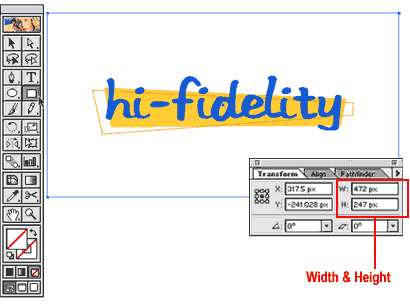
Use the rectangle tool (M key) and draw a rectangle around your artwork. For precise sizing, either click once in your workspace using the rectangle tool and enter the size in the pop-up options window or draw a rectangle and use the transform palette to enter new measurements.

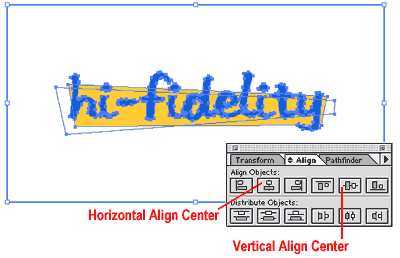
Align the rectangle around your artwork using the align commands (Window>Show Align).

If you have complicated artwork that you’re working with, before aligning select all of your artwork (but not the new rectangle) and group it together (Object>Group or Command + G). By doing this, you’ll be able to align the rectangle with your graphics while keeping the artwork intact. (Otherwise, aligning will reposition all of the elements in your artwork.) After aligning, choose Object>Ungroup (Shift + Command + G) to release the artwork

With the new rectangle selected, choose Object>Crop Marks>Make. That’s it. Notice that the rectangle has turned into an uneditable set of crop lines.
Now, when you import your artwork into AE (or other program) it will be contained within the area that’s specified by your crop marks. To resize or reposition cropmarks, choose Object>Crop Marks>Release.
Keep in mind that when you set crop marks and import the Illustrator art into AE, anchor points are going to be determined by the dimensions of the crop marks. When animating properties such as scale and rotation, or using effects that refer to a layers anchor point, you’ll likely have to adjust the anchor points of the layer(s).
When you’re setting crop marks for After Effects, it’s a good idea to keep in mind the size of your final composition, and how large the Illustrator artwork is going to wind up. This way, you can determine the necessary size of your artwork, and avoid having to scale up and collapse layers in AE.


