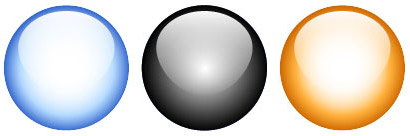
Perhaps you're hooked on the "Aqua" look and are just aching to use it in your work. Look no further Trend Boy and/or Girl! Requires Adobe Illustrator 9+. This tutorial teaches you how to create Opacity Masks that lend a photorealistic touch to your work.
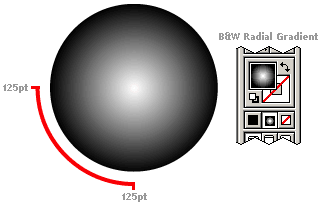
1. Create a circle with a radial gradient
Use the Ellipse Tool to create a circle and apply a black & white gradient fill from the Toolbar, selecting "Radial" from the Gradient Palette (Window > Show Gradient). Before going further, make two (2) copies of this black & white gradient circle each on their own layers. Name the first "pooky" and the second "dooky" (or whatever!); lock these layers. These will be used later for our Opacity Masks.
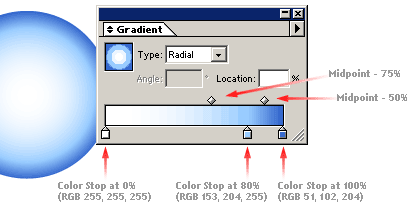
2. Adjust gradient position & color
With the original circle selected, click below the Gradient Color Ramp on the Gradient Palette to add another color stop at the 80% location. The image below shows the position of Midpoint Markers, Color Stops and the RGB values used in this example.
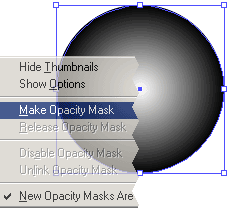
3. Apply Opacity Mask
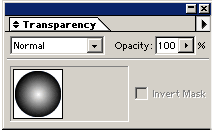
Turn on and "unlock" the "pooky" layer that was saved from Step 1. This layer needs to be above or in front of the blue radial gradient. Select both the blue circle and the black & white circle with the Selection Tool. On the Transparency palette (Windows > Show Transparency), select Make Opacity Mask from the Transparency palette menu. Make sure the "New Opacity Masks Are Inverted" menu option is checked when doing this. You've now made an Opacity Mask.
To make sure it's worked, turn on the Transparency Grid (View > Show Transparency Grid) and a checkerboard pattern should be visible through part of the circle.

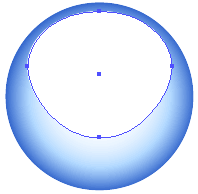
4. Modify Mask Shape
This next mask shape will serve as the highlight for our ballz. Unlock the "dooky" layer that was saved from Step 1. Select the circle, set the "Fill" to white and, using the Scale Tool, reduce it by 15%. Modify the circle to closely match the one shown below. This was achieved by vertically "squashing" the circle and pulling down the bottom anchor point with the Direct Selection tool.
5. Apply Linear Gradient
On the "dooky" layer, draw a rectangle that closely overlaps the mask shape and apply a Linear Gradient using the settings shown in the palette below.
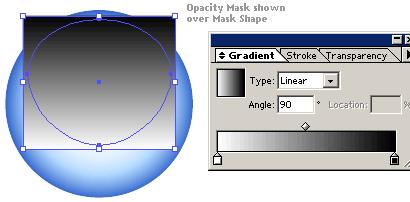
6. Apply Opacity Mask; Poof you're done
Select both objects making sure your gradient object is over your mask object and select Make Opacity Mask from the Transparency palette menu. Turn on your Transparency Grid again to verify.