Light and fluffy clouds are easy to create in Illustrator and I'll show you one way to create them. This tutorial introduces you to a few of the Pathfinder filters and will familiarize you with the Drop Shadow stylize effect in Illustrator 9+.
1. Create the sky background
Create the "sky" that the clouds will drift through by drawing a sky blue rectangle with the Rectangle Tool. My preference is to cover the entire artboard and resize it later, if necessary. When done, lock this layer and name it "Sky"; it will serve only as a background, nothing more.
2. Draw the basics
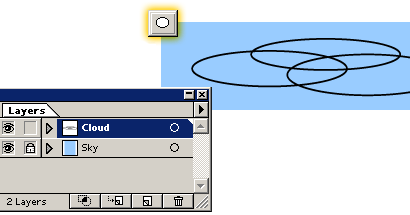
Create a new layer above the sky layer and name it "Cloud". On this layer, use the Ellipse Tool and draw some flat ellipses (as shown) and combine them in a manner resembling the shape below.

3. Unite the objects and Fill
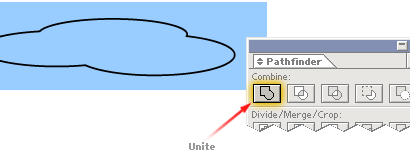
With the Selection Tool, select all of the objects, then click the Unite command in the Pathfinder palette. This combines all of the objects into one.

Before moving on, toggle the cloud outline to a fill and color it white.

4. Offset the objects
Paste the copy in front of the original (EDIT > PASTE IN FRONT). Simply pasting the object will likely put it out of alignment with the original so use PASTE IN FRONT. Fill the copied object with a grey color then choose PASTE IN FRONT again to place another cloud on top of the grey cloud (this new copy will be white); offset the white object above the grey object as shown.

5. Apply Minus Front command
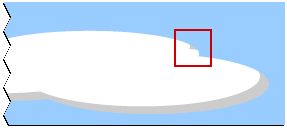
Select both objects and click the Minus Front filter from the Pathfinder palette. This, in essence, uses the white object to cut into the grey object leaving only the grey portion. If you have some unwanted pieces of grey (as shown here), select the grey object and ungroup (OBJECT > UNGROUP) then delete the offending remnant.

6. Apply drop shadow
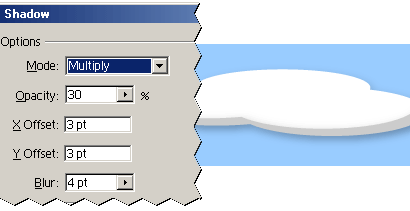
Unlock the original cloud object (OBJECT > UNLOCK ALL) and select it and the grey object and group them (OBJECT > GROUP). From the Effect menu, add a drop shadow (EFFECT > STYLIZE > DROP SHADOW). The settings used here, are shown below.
