Okay for alot of people familiar with Adobe
Illustrator this is may seem like a very simple tutorial, but for alot of beginners the pathfinder palette can be quite unknown and is a such an important tool in creating shapes in
Illustrator, so if you are an intermediate to advanced user of this application, you will problably want to just pass this one over. If you are beginner and you are already asking the question what is the pathfinder palette, or what the hell does it do, then this is the tutorial for you.
Step 1 Create an new document
With Adobe Illustrator open go to File --> New
You can set the size to whatever ever you like but for simplicity's sake I will use the default 8.5x11 inch.
TIP: You can undo a mistake at any time for many steps by hitting ctrl+z or ctrl + shift +z if you go back to far.
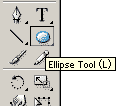
Step 2 Select the Elipse Tool
In the tools palette select the Elipse Tool (L). If you dont see the little circle in the palette it may be one of the other shapes (most likely the square) - click on the tiny little arrow in the bottom right corner for a flyout of all the shapes. Failing that just type "L" on the key board. :)
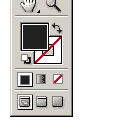
Step 3 Set your fill color
Make sure your Fill color is the color you want, and there is no stroke as you see in the diagram to the left.
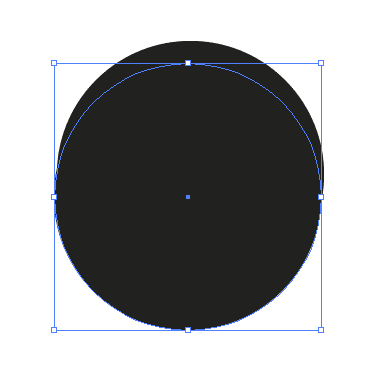
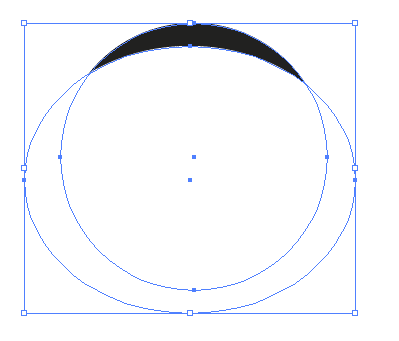
Step 4- Make the circle
Then take your elipse tool to the empty page and holding the 'shift' key click and drag to make your circle. Holding the 'shift' key constrains the circle so it stays a perfect circle. You shoul dend up with something like the circle to the left.

Step 5 Make a duplicate of the circle
There are several ways to do this step in Adobe Illustrator, but for this tutorial we are going to keep it simple. Make sure your cirlce you just created is selected by clicking on it if it is not. When its selected press "Ctrl + C" and then "Ctrl+V". The old copy and paste maneuver. Now you should have two cirlces.
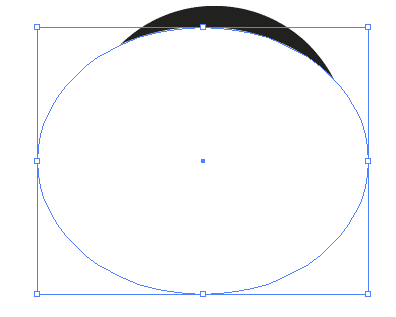
Step 6 Make the new cicle white and deform it
Now, similar to step 3, you are going to make your fill color white. With the new circle selected, make sure the fill color square is forward in the tools palette then select a white swatch from the swatches palette. If your swatches palette is not immediately visible you can find by going to Window --> swatches.
Part two of this step once you have the new circle white is to drag one of the center points on either side and pull it slightly (dont hold shift) and you should end up with something like I have on the left.
Step 7 Select both objects
You can use your select tool (v) and select both items or just hit "ctrl + A" to select all.
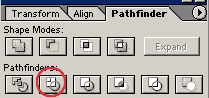
Step 8 The Trim
Now bring up the path finder palette. (Shift + F9) or Window --> Pathfinder. With the both objects both selected hit the trim button. The pathfinder is one of Adobe Illustrator's very handy features.
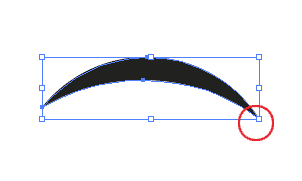
Step 9 The Trim
Now we need to clear the debris so to speak. Your two objects will look much the same for the moment, but they have actually been grouped together for the time being by the Trim action. With the objects still selected press "Ctrl+shift+G" to ungroup them. If that doesnt work at first try unselecting the items by clicking anywhere else then reselecting them (ctrl +A) and the repeat the ungrouping by 'Ctrl+shift+G'.
Now the two objects should be seperate so click on the white circle and delete it (del). If both your objects dissapear then you didn't ungroup them and will have to undo your step and go back to the ungrouping phase and try again. You can undo a mistake at any time for many steps by hitting ctrl+z or ctrl + shift +z if you go back too far.
Now with the white circle cleared you shoul have a shape similar to the one to the left.

Step 10 Select the Free Transform Tool
Back to the Tools palette. Select the Free Transform tool.

Step 11 Tranform using perspective
Okay this step is a bit tricky and you may need several attempts at it if your coordination skills are sub par like mine ;) With the object selected and using the Free Transform Tool grab one of the bottom corner handles by clicking on it and begin dragging it - but as you are doing it (not before you start) hold down 'ctrl+alt+shift' and the object should start transforming in perspective.....take some time to play with this tool, it can come very handy later. :)
Step 12- The swoosh.
Now you ahve something that looks remarkably like some other famous mark that rhymes with 'Mikey'.
Alright, before I have some lawyers calling me, I will change this around a bit using the copy and paste technique we used earlier in step 5, and create another circle. Oh yeah and rotate them. That's easy you can do that by going Object --> Transform --> Rotate.

Voila! Okay its nothing wonderful....but hopefully you get the idea, and can use the Trim tool and the Free Transform tool to create some of your own stunning vector graphic visuals!