Step 1
Open Illustrator and create a new document with any size you want. Choose a company name and a slogan for this. I’ll use “Company” and “company slogan”.
Step 2
Inside the document type your company name and company slogan with what font you want. I’ve used “Arial Black” for company name and “Arial Regular” for the slogan:

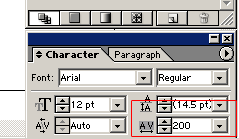
Step 3
Choose a color for your text. For the company text a grey color and for slogan a dark blue color. Resize the text and add more space between the letters. Use the Character Tab for this operation. Set “tracking” to 100 for the “company” text and to 200 for the “slogan company” text:
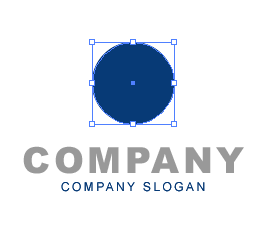
Now you have a logotype for your company.
Step 4
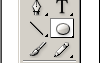
Let’s create a simple symbol for this company. Select Ellipse Tool (L) and draw an ellipse above the logo text:
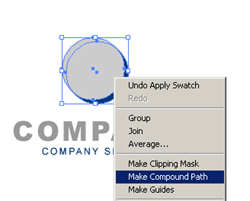
Step 5
Draw another one, right click on the selection and select Make Compound Path:
Step 6
With the Pen Tool selected draw an area like this:

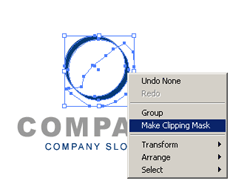
Step 7
Select all beside the text, right click and choose Make Clipping Mask:
This should be te result:

Step 8
Duplicate your symbol, then rotate it like here and you have a new logo for your company: