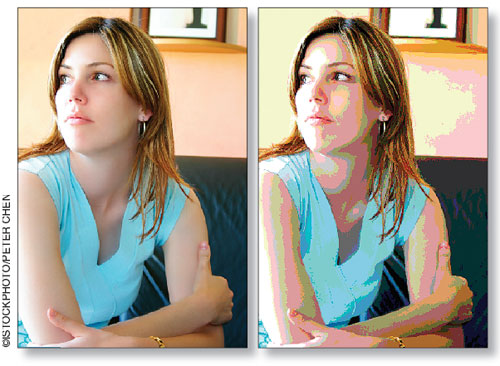
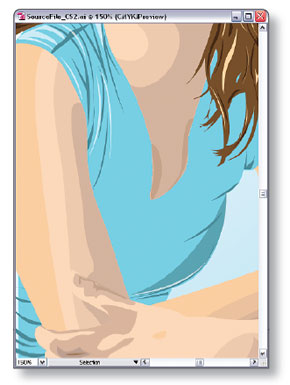
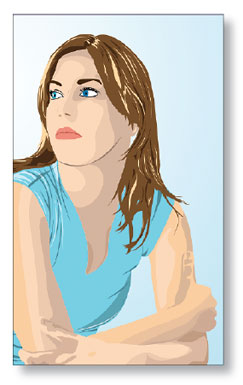
 Mixing vector and photo is one of the hottest trends in the illustration industry today. We’ve seen this effect used in national ad campaigns from Anheuser-Busch to Hawaiian Tropic. In this tutorial, we’ll take a look at how to create this effect in Illustrator. Before you begin, keep in mind that you can download the Illustrator source file used in this column. It comes complete with the original photograph (kindly provided by www.istockphoto.com). Have fun!

|
|
| STEP 1 |
Prepare Your Image |
| Unless you’re an insanely talented artist, you may need some help getting started. Using a reference photograph is perfectly acceptable. To do this, open your photo in Photoshop and apply a Posterize adjustment to break the illustration down to basic colors. This helps get your reference photograph to a point that makes it easier to trace. For a more detailed look on how to get your photo ready in Photoshop, visit www.layersmagazine.com/design/ps-index.php for a tutorial. For now, let’s assume your image is ready at this point and you’re good to go. |
|
|
| STEP 2 |
Trace the Subject's Face |
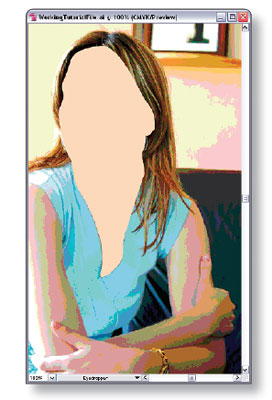
| First, you’ll create the overall outlines of the woman. Break this down to major areas or body parts within the photograph. Here, we’ve started with the neck and the face. Optionclick (PC: Alt-click) the Create New Layer icon in the Layers palette and name this layer “FACE” in the Layer Options dialog to help keep things tidy. Choose the Pen tool and create a path that encompasses the neck and face area. Set the Fill to a skin tone in the Color palette (we used R: 242, G: 216, B: 186 here) and the Stroke to none. |
|
|
| STEP 3 |
Trace Subject's Shirt |
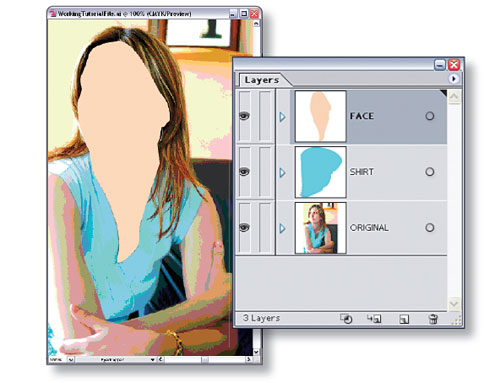
| Next, create a new layer named “SHIRT” below the FACE layer. Use the Pen tool to trace the shirt. Notice that the hair covers the shirt in certain places. Don’t worry about tracing too perfectly along these areas. Just guess at where the shirt belongs behind the hair. Later, we’ll add a hair layer that will cover this up so there’s no need to get too detailed at this point. |
|
|
| STEP 4 |
Trace Subject's Arms |
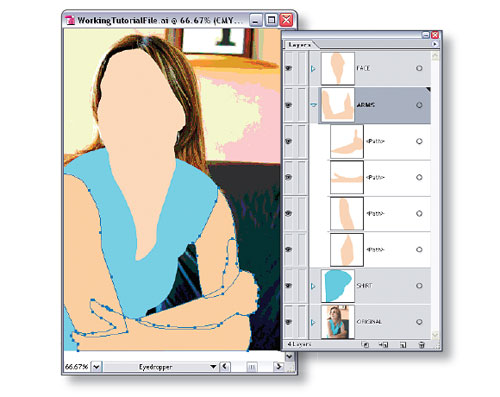
| Now move on to the arms and create a new layer named “ARMS” above the SHIRT layer. Because the subject’s arms are folded, we’ve created a separate path for each segment of the arms for a total of four paths. Each path that you draw will be on its own sublayer within the ARMS layer. You’ll have to use your best judgment here, depending on your photograph. The goal is to leave your illustration as flexible as possible, and having each area of the arm on its own sublayer helps for this image. |
|
|
| STEP 5 |
Trace Subject's Hair |
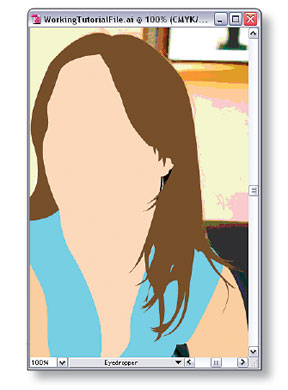
| Create a new layer named “HAIR” above the FACE layer. The more time you spend tracing the hair, the better your illustration will look. (To give you a reference, we spent about 15 minutes using the Pen tool to create the hair the way you see it here.) Also, you don’t need to get it all in one path. You can always go back and add paths for some of the wispy areas of the hair that make tracing more difficult in one pass. Before you move on, be sure to set the Fill color for the hair to R: 108, G: 78, B: 46. |
|
|
| STEP 6 |
Add Eye Layers |
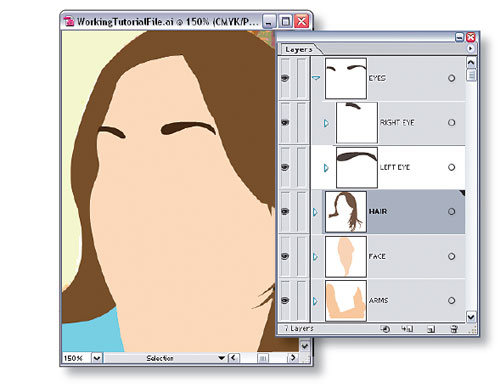
| Now let’s give our illustration a face. Create a new layer above the HAIR layer and name it “EYES.” With the EYES layer active, Option-click (PC: Alt-click) the Create New Sublayer icon in the Layers palette to create a “RIGHT EYE” sublayer and a “LEFT EYE” sublayer. Begin by tracing the eyebrows and place them in their respective sublayers to keep things organized. Set the Fill color to R: 63, G: 44, B: 25, and the Stroke to none. Remember, you’ll have to continually hide and show layers in order to see the reference photo in the background. |
|
|
| STEP 7 |
Trace and Fill Eyes |
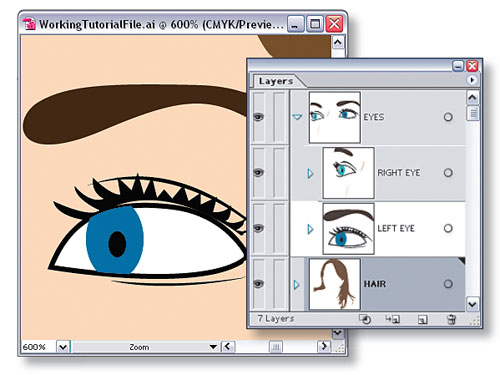
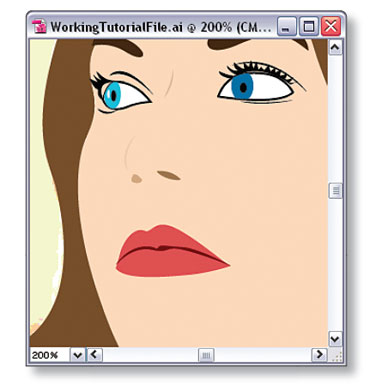
| Zoom in and start tracing the eyeball area. Take a layered approach here. First, trace the general outline of the eye and fill it with a darker tone (we used black). Then trace the white area inside and fill it with—you guessed it—white. Add small details with the Pen tool for lines around the eye that make it look realistic. Repeat this process for the other eye. (Note: If you picked a straight-on photograph, you can just duplicate the first eye sublayer that you create and flip it by choosing Object>Transform> Reflect. If not, alas…you’ll have to create another eye.) |
|
|
| STEP 8 |
Add Nose Layer |
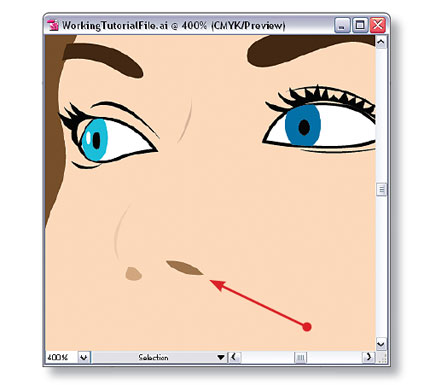
| Next, create a new layer named “NOSE.” This part is surprisingly easy since our reference photograph shows that we can get away with adding the nostrils and a slight shadow or two on the inside of the nose to bring out the necessary details. |
|
|
| STEP 9 |
Add Lips Layer |
| Now we’re ready for the lips. Use the same approach here that we’ve been using so far. Trace the overall outline of the lips and then add details on top. Here, we traced the lips with the Pen tool and fi lled the path with R: 192, G: 82, B: 82. Then, we created another path to separate the top and bottom lip. Set the Fill color of that path to R: 99, G: 10, B: 15. Be sure to set the Stroke to none for both paths. |
|
|
| STEP 10 |
Enhance Hair with Highlights and Shadows |
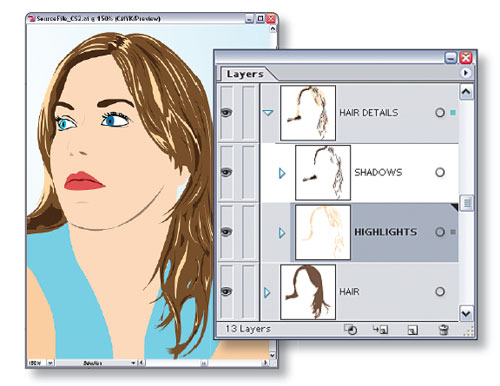
| Everything looks good so far but it’s rather flat. That means it’s time for some highlights and shadows. Our main areas of concern will be the hair, face, arms, and shirt. Let’s start with the hair. Create a new layer above the HAIR layer named “HAIR DETAILS.” Using the Pen tool, draw highlights throughout the hair. It may be useful to hide the HAIR layer so you can see the reference photo underneath. Fill these highlights with R: 246, G: 214, B: 163. Do the same for some of the shadow areas (we used R: 66, G: 46, B: 28) as well. We’ve created two sublayers here to hold the details. |
|
|
| STEP 11 |
Add More Shadows |
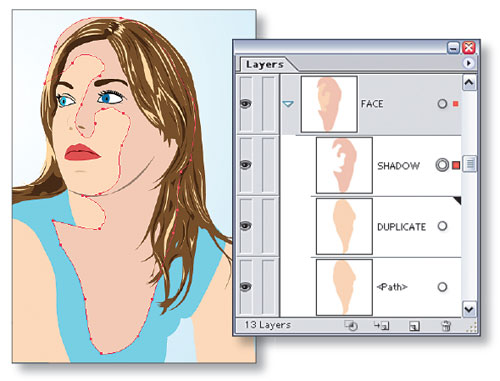
| We’re almost done! Use the same technique we used on the hair to add shadows to the face, arms, and hands. You’ll want to keep the Pathfinder palette handy for this task as well. For example, duplicate the FACE sublayer by dragging it to the Create New Layer icon and name it “DUPLCATE.” Then, use the Pen tool to create a loose shadow around the neck and/or face and name this path sublayer “SHADOW.” Set the Fill color to R: 207, G: 178, B: 156. Don’t worry about the areas that extend beyond the original neck shape. We’ll fix that in the next step. |
|
|
| STEP 12 |
Remove Excess Shadow |
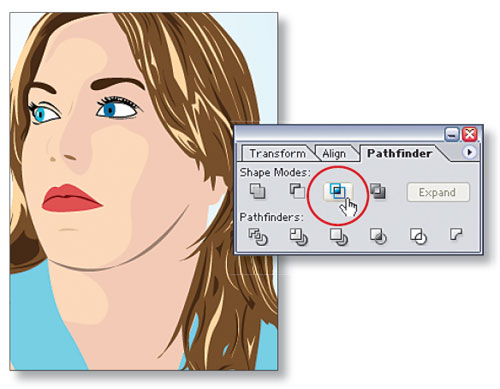
| Shift-click the circles to the right of the DUPLICATE and SHADOW sublayers in the Layers palette to target both sublayers. Then, open the Pathfinder palette and Alt-click (PC: Option-click) on the Intersect Shape Areas button. This will remove any area of the shadow that extended beyond the original neck shape. However, since we made a duplicate of the neck shape, the original path is still intact and we now have a shadow on top of it. Repeat this process throughout the face, neck, and arms to add more depth to the illustration. |
|
|
| STEP 13 |
Trace Subject's Hair |
| Finally, add some shadows and highlights to the shirt. This process is very similar to the one used on the hair. Here, we’ve used R: 97, G: 136, B: 149 for the shadows and white for the highlights. Feel free to adjust the opacity in the Transparency palette to lessen the shadow or highlight effect. |
|
|
| STEP 14 |
Create New Background |
| That’s it! One last step would be to hide the reference photo layer and create a new background. Here, we’ve added a light blue gradient in place of the original background. |


 Mixing vector and photo is one of the hottest trends in the illustration industry today. We’ve seen this effect used in national ad campaigns from Anheuser-Busch to Hawaiian Tropic. In this tutorial, we’ll take a look at how to create this effect in
