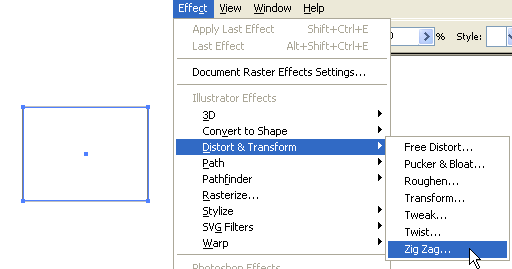
1. Draw a rectangle path
Select the
Rectangle Tool, create a box like the image below. Go to
Effect > Distort & Transform > Zig Zag.
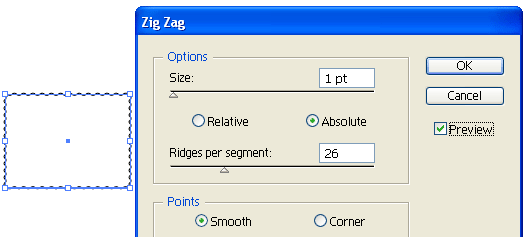
Zig zag Options
When the
Zig Zag window popups, check
Preview to preview the result, enter
Size=1,
Ridges per segment=26, then click OK.
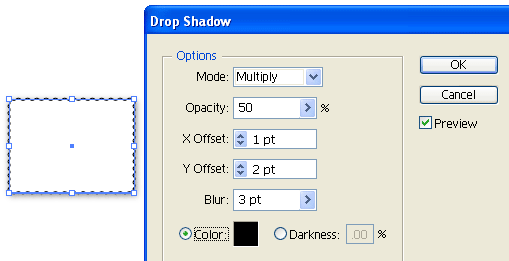
2. Add Drop Shadow effect
With the path selected, go to
Effect > Stylize > Drop Shadow, and enter the following setting:
Opacity=50,
X Offset=1 Y
Offset=2,
Blur=3, and select black color.
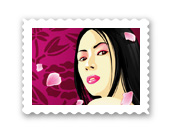
3. Place in your artwork
Now you can remove the stroke color and place in your artwork and align them center. That's it!
Bonus Tips
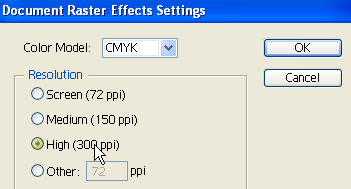
If you are creating this stamp for print, make sure your
Document Raster Effects Settings is 300dpi or you will get pixelated print out. To change your setting, go to
Effect > Document Raster Effects Settings. If you are designing for web/screen, leave it as 72dpi because higher dpi takes more memory.
<!-- #BeginLibraryItem "/Library/tutorial_comments.lbi" -->


 Download Source File (.ai)


