1. Flower petal
Create two stroke paths: one yellow and one blue.

2. Blend Options
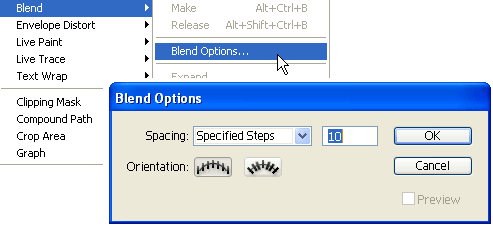
Go to
Object > Blend > Blend Options and set it to
Specified Steps = 10. Specified Steps basically tells how many step to blend from 1 object to another.

Blend
Now select the 2 petal paths, go to
Object > Blend > Make or press
Ctrl + Alt + B and you should get something looks like the image shown below.

3. Duplicate more petals
Duplicate more petals to form the flower by
Copy & Paste or
Alt + Drag.

4. Stem
Create a stem by using the same Blend technique as in the previous step. Here I set the Specified Steps = 8.

5. Leaf
The leaf is formed by 2 parts, top and bottom. I use Specified Steps = 5 here.


 Download Source File (.ai)


