First, create a path like the image shown below with the
Pen Tool, go to
menu Effect > 3D > Revolve
3D Revolve Options
The
3D Revolve Options window should pop up and look like the image below. Click on
More Options if the lower portion window is not showing. You can leave most of the setting as default, but add an additional light spot by click the
New Light icon and drag it to the lower left corner as shown. Enter 35 for
Blend Steps, maximum
Blend Steps is 256, higher
Blend Steps results better rendering quality but also increases file size and memory.
2. Create the flower symbol
Now use the
Ellipse Tool, create a flower like the image below. I have a very simply flower illustration here, but you can create anything as you like. Drag the flower to the
Symbols Library Pallate to create a new symbol. If your
Symbols Pallate is not showing, press
Ctrl+Shift+F11 or go to
Windows > Symbols to show
Symbols.

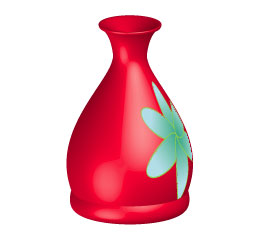
With the vase object selected, in
Appearance Pallate, double click on the 3D Revolve effect icon(f) to change the
3D Revolve Options.
When the 3D Revolve Options window pop ups, click on Map Art button.
Map Art options
Check Preview option so you can preview the result. At the top where it says,
Surface, use the arrow buttons to locate the surface that you want to
Map Art. Notice there is a red wireframe on your object which show you the surface you've selected. In this case, it is 4 of 5. From the
Symbol drop down, select the symbol that you've created in the previous step. You can position and resize the symbol in way as you want. You can also create multi-surface
Map Art by selecting the
Surface then the
Symbol. Click OK when you are happy with the result.
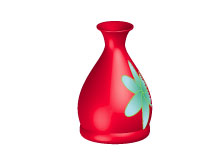
Final
That's it! With just 3 simple steps, I just created a nice 3D Vase with
Illustrator 3D Revolve Tool.
<!-- #BeginLibraryItem "/Library/tutorial_comments.lbi" -->


 Download Source File (.ai)
 Send to Friend
 Bookmark
 Print Version


