Creative Template: Navigation
[ 作者来源:photoshopstar
编辑整理:
PhotoShop资源网
更新时间: 2006-10-02
录入: 黄叶飞扬 ]
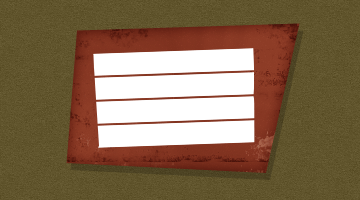
OK so in this tutorial you’ll learn how to make a sort of TemplateMonster-Style Nav Box.. sorta thing.. .. like so! :

1.
Like always start by creating a document, for random things like above I use 500×500 px documents  If you havn’t already, go over and do the Basic Background Tutorial then fill the background with the pattern
2.
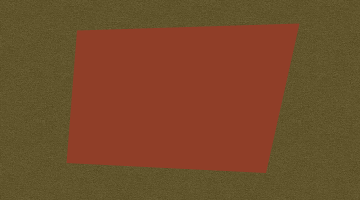
We’ll start from the bottom.. make a new layer then use the Polygonal Lasso Tool  Use the polygonal lasso tool to make a sort of square slanted box thingy like so:

Fill the selection with a nice lightish red (#903e28)

Now apply ALL of these layer styles  Drop Shadow
Inner Glow
Pattern Overlay (download the pattern here)
Satin
And now you’re left with something quite nice looking 

3.
I downloaded some nice “Old School” grunge-brushes from www.photoshopbrushes.com/
I used them on a new layer to add a quite nice feel to the box (So what I did was brush a bit, erase a bit then set the layer mode to Overlay)

Ah the buttons!  Create a new layer and get the Rectangular Marquee Tool and make a set-sized selection of 160×22

Fill the selection with White (#FFFFFF). Now duplicate the layer and move it downwards (I made it so each button was 2px apart in height

After you made the buttons merge them together. Then rotate them slightly by going into transform mode (CTRL+T) (Note: I only rotated mine 2 degrees anti-clockwise)

Apply these layer styles to the buttons layer:
Drop Shadow
Inner Shadow

4.
Create some basic black text and rotate it a tad and move it into place.

Add any other creative touches you can think of!

Thanks for reading and the PSD can be found: here
≡★ 免 责 声 明 ★≡
除本站原创外,本站所提供的所有教程均收集整理自网络,其版权归该教程直原始作者或原始出处所有!
除特别声明外,您可以在保持教程的完整和注明来源的前提下免费复制、转贴本站所提供的所有教程;但是,不可以盗链本站的图片!
除特别声明外,在未经许可的情况下您不得将本站所提供的任何教程(包括资源)用于商业用途;
如果确有需要,请自行与该教程的原始所有权者(即:原始作者或出处)联系,本站不提供相关服务;否则,由此而引发的一切后果由您自负!


 Use the polygonal lasso tool to make a sort of square slanted box thingy like so:


