|
To create or modify an art brush
You can create an art brush from one or more objects, including a compound path, but not a gradient, gradient mesh, or mask. When it’s applied to a path, an art brushstroke follows the shape of the path. If you reshape the path, the art brushstroke will stretch or bend to conform to the new path contour.
 To create a new brush, select one or more objects. Let’s create some text to use for this exercise. Because this is type we will need to convert the text to outlines, and we can do that by going to the main menu bar and selecting Type > Create Outlines. To create a new brush, select one or more objects. Let’s create some text to use for this exercise. Because this is type we will need to convert the text to outlines, and we can do that by going to the main menu bar and selecting Type > Create Outlines.
Now go ahead and drag the outlines onto the Brushes palette, click the New Brush icon located at the bottom of the palette and click New Art Brush from the pop-up New Brush dialog box. The Brush Options dialog box should now be on screen. Take some time to look at this dialog box:
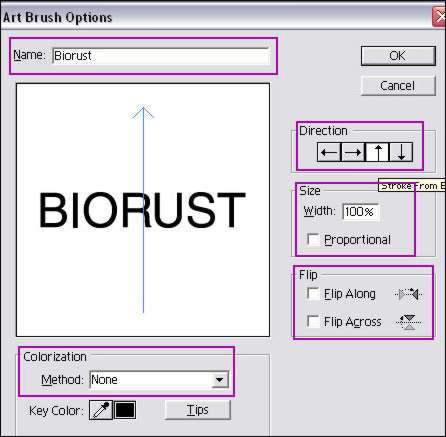
At the top of the dialog box is a section for the Name. If this is a new brush, then go ahead and give it a new Name. If it is an existing brush, there will already be a name showing. I am naming this brush BIORUST.
On the right hand side is a section called Direction with 4 arrows; left, right, up, down. These buttons control the orientation of the object on the path. The object will be drawn in the direction the arrow is pointing. Select the up arrow.
Below Direction you find the Size section. This is the width to scale the art brush. If you want to preserve the original object’s proportions you should check Proportional.
Another section you may want to try out is the Flip. If you check Flip Along it will reverse the object on the path (left to right). Check Flip Across to reverse the object across the path (up and down).
Colorization is at the bottom of the dialog box and you have 4 choices; None, Tints, Tints and Shades, & Hue Shift. I am leaving the Method as None.
 Click OK and take a look at what you have now. There is no change to the object on the artboard, but the Brush palette now contains a new brush called ‘Biorust.’ Deselect the current artboard object by clicking away from it and then click on the new brush you created and drag it to the artboard. This new brush has now changed direction to up and down reflecting the change we made on the Brush Options dialog box. Click OK and take a look at what you have now. There is no change to the object on the artboard, but the Brush palette now contains a new brush called ‘Biorust.’ Deselect the current artboard object by clicking away from it and then click on the new brush you created and drag it to the artboard. This new brush has now changed direction to up and down reflecting the change we made on the Brush Options dialog box. |
|
To expand a brushstroke
 When you expand a brushstroke it is converted into an ordinary object. If you then change the original brush, you won’t have the option to update the brushstroke on the object. When you expand a brushstroke it is converted into an ordinary object. If you then change the original brush, you won’t have the option to update the brushstroke on the object.
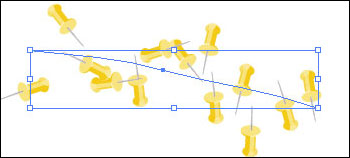
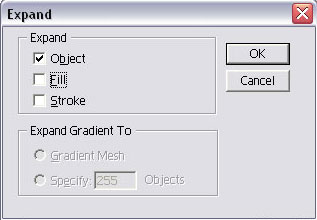
From the main menu toolbar select Object > Expand. In the Expand dialog box select the Object or Stroke option and deselect the Fill option. I am selecting the Object option. Click OK.
 The brushstroke is now a separate object(s). Again go to the main menu toolbar and select Object > Ungroup, this will separate the brushstroke object(s) from the original path. The brushstroke is now a separate object(s). Again go to the main menu toolbar and select Object > Ungroup, this will separate the brushstroke object(s) from the original path.
To test this, click away from the object on the artboard, then click on the path. Where did the path go? It is still there, just not visible.
|
|
Preparing an Image for Use As a Brush
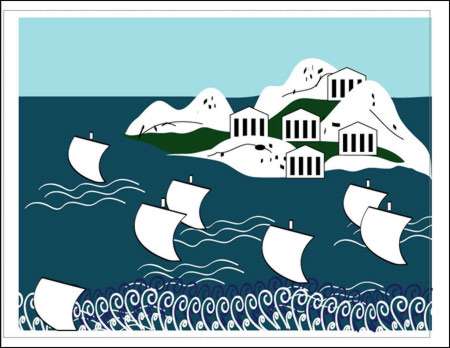
Take a look at the image below. In order to use it as a brush we first need to get rid of any illegal elements, such as gradients, masks, and dynamic brushes. The mountains, flat waves and whitecaps contain elements that we need to expand. If you want to follow along in Illustrator yourself, you can download the source files here.
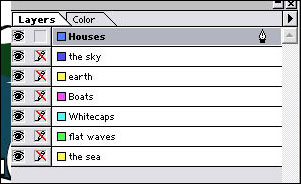 Open your layers palette and lock all the layers except the Houses layer. Houses layer should be active. Open your layers palette and lock all the layers except the Houses layer. Houses layer should be active.
Select the entire image (Win: Ctrl+A, Mac: Cmd+A). Choose Object > Expand. In the dialog box check expand Object, Fill, and Stroke, click OK, then lock the layer.
Unlock and make active Whitecap layer. Select entire image, just as you did previously. Again we choose Object > Expand. Expand the Object, Fill, and Stroke, click OK. Lock the layer.
Unlock and make active Flat Waves layer. Select entire image. Choose Object > Expand. Expand Object, Fill and Stroke. Lock the layer.
Unlock and make active Boats layer. Calligraphic strokes are here and they also must be expanded. Choose Object > Expand. Expand Object, Fill, and Stroke. Lock the layer.
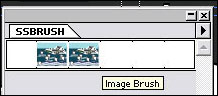
The image does not look any different, but Illustrator now will let you create a Pattern brush from it. In the Brushes palette drop down menu, choose Select All Unused. Then from the same drop down, choose Delete Brush. Click on OK to the warning message. Unlock all the layers, select the entire image, and drag the entire image into the Brushes palette. In the New Brush dialog box select the Pattern Brush. Go ahead and name the brush “Image Brush”. Leave the Scale at 100% and change the Colorization method to Tints And Shades.

Be sure to save the document as SSBRUSH.ai and go ahead and close the document.
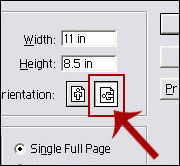 Now let’s create a new Illustrator document. Choose File > Document Setup, we will need to change the orientation of our document to Landscape mode (wider than long). Now let’s create a new Illustrator document. Choose File > Document Setup, we will need to change the orientation of our document to Landscape mode (wider than long).
Turn on the Rulers (Win: Ctrl+R, Mac: Cmd +R). Drag a guide from the top ruler to the 5 ¼ inch mark on the left vertical ruler. Set the Fill color to None and the Stroke color to 50% black and select the Pen Tool.
Click on the left side of the guide where the guide meets the image margin. Now press Shift and click on the guide where it meets the right edge of the document. Yes, you will be going past the margin on the right side. Turn off the Rulers and choose View > Clear Guides.
 Select Window > Brush Libraries > Other Library. Select the file you created and saved as SSBRUSH.ai and choose the stroke you selected. Click on Image Brush. Choose the Selection tool and click on the artboard. Use the arrow keys to move the image into position top to bottom. Go ahead and stretch the path a bit if you need in order to make the image fill the document area inside the margin guides. Select Window > Brush Libraries > Other Library. Select the file you created and saved as SSBRUSH.ai and choose the stroke you selected. Click on Image Brush. Choose the Selection tool and click on the artboard. Use the arrow keys to move the image into position top to bottom. Go ahead and stretch the path a bit if you need in order to make the image fill the document area inside the margin guides.
Experiment with changing the Stroke color to change the coloring of the entire image. When you drag the Stroke selection slider, you will see different monochromatic color schemes, choose the one you like best.
And that's all there is to basic brush functions in Illustrator. Have fun! :) |


