Reposition it
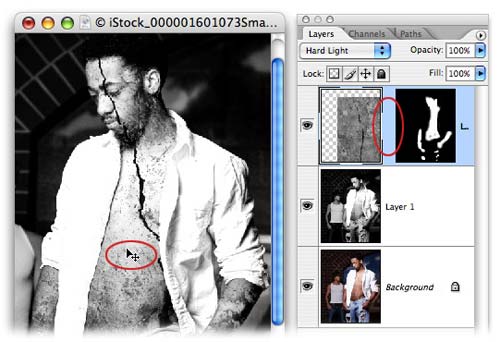
Step 11: Not bad, but I’d really like to move the crack in that marble around. To do so, we need to unlock the mask from the marble image by clicking the little chainlink icon between the marble and mask thumbnails (circled in red below). Press V to select the Move tool, select the marble thumbnail in the layers palette (notice the hairline border around it, as shown below), then mouse over to the document to move the marble while the mask stays in place.
When finished, you can lock the layer mask again by clicking once between the image and mask thumbnails to bring back the little chainlink.
Intensify it
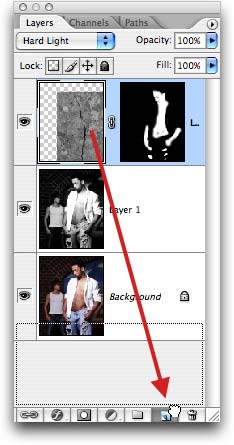
Step 13: Increase the effect by duplicating the stone layer. Just click and drag it to the bottom of the Layers Palette and release when it touches the New Layer icon, as shown below:
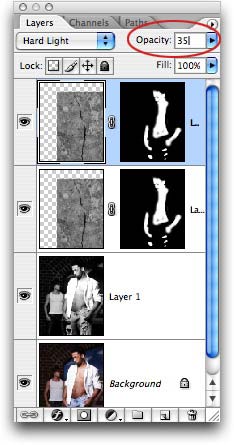
Step 14: Lower the opacity of the duplicated marble layer to 35%.
Color it
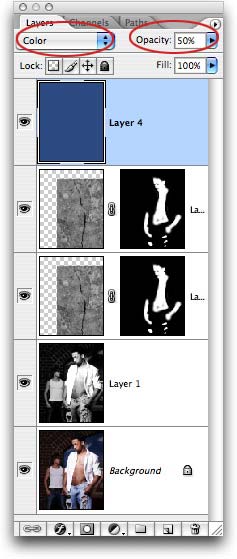
To spice things up a bit more, I gave the entire image a blue tint by adding a new layer which I filled with blue. I changed the blend mode of that layer to Color, and lowered its opacity to 50%.
Here’s what my Layers Palette looks like:
Admire it!
Fix yourself a nice cup of tea and gaze upon the final image. Breathe deeply, inhale the calming aroma of your brew and smile—you’ve now embraced your inner Medusa.


