首页

PS教程

PSD素材

PS素材

背景图片

高清图片

字体下载

矢量素材

PS资源

PS作品

会员专区
注册 / 登录
收藏
入门教程照片处理抠图教程调色教程文字特效经典合成鼠绘教程滤镜特效非 主 流GIF 动画签名溶图创意设计
 您当前的位置: PhotoShop资源网 >> PS教程 >> PS教程 >> 创意设计 >> 正文

Drawing a Paintbrush in Illustrator

[ 作者来源:northlite.50megs 编辑整理:PhotoShop资源网 更新时间: 2006-08-03 录入: 黄叶飞扬 ]

Constructing the Metal Collar and Assembling the Brush

Step 16. Access the rounded rectangle tool by holding the mouse button down over the rectangle in the toolbox and when the flyout opens, slide the mouse to the rounded rectangle. Release the mouse button to select it, and then click on an empty part of the art board to open the rounded rectangle options. Set the options the same as we did for the ellipse for the brush handle, but make it 16px by 2 px, with a corner radius of 2px. (Remember to type "16px" etc. if you haven't got your preferences in the units and undo set to pixels.) You might want to zoom in (hold down the spacebar and then the control key to temporarily change to the zoom tool) so you can see better. The one on the right here has been scaled to 200% so you can see it better on the webpage. It's at the default setting of white fill and 1 point black stroke, but we'll be changing that.

按此在新窗口浏览图片


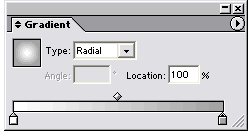
Step 17. In the swatches palette select the black and white radial gradient for the fill. It will be too dark though so we'll change the gradient colors as we did for the brush handle. First change the stroke to gray, which is to the right of black in the swatches palette, and next we'll edit the gradient.

按此在新窗口浏览图片


Step 18. Open the swatches palette, and the gradient options as we did before and drag the gray swatch (just to the right of the black one, same gray as we used for the stroke) to the black gradient stop on the far right side of the gradient ramp in the gradient palette. Your gradient turns to a white-to-silver gradient from the white-to-black one it was, and so does the rounded rectangle, as shown below.

按此在新窗口浏览图片
按此在新窗口浏览图片


Step 19. Now with the silvery rectangle selected, use the selection tool (V) and start to drag it, then hold down the ALT key, then the SHIFT key. Holding the ALT key will make a duplicate; holding down SHIFT as well will constrain the copy to a 90° angle if you drag down. (Or a 45° angle if you happen to be dragging at an angle that is not a right angle). Stop when the duplicate is just touching the original.

When using the ALT+Drag method of duplicating make sure to let up on the modifier key or keys (in this case, both the SHIFT and ALT) BEFORE you release the mouse button. Don't worry, it's easier than it sounds and once you do it a couple times it's instinctive.

Now you've got two rings for the collar.

按此在新窗口浏览图片


Step 20. Hit Cntl+D to make two more copies, perfectly aligned. (Cntl+D always repeats your last command.) Now you have a stack of four rectangles like the ones on the right. Draw a marquee around the four rectangles, and go to Object > Group (or type Cntl+G) to group them.

按此在新窗口浏览图片


Step 21. Double click on the rotate tool as we did before and set the rotation angle to -45° Tick the preview box to make sure the rectangle group looks like the one on the right.

按此在新窗口浏览图片


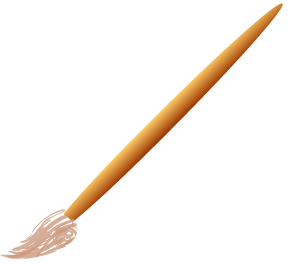
Step 22. Position the bristles at the left end of the handle. If you need to to make the bristles be behind the handle, with the bristles selected, go to Object > Arrange > Send to Back.

You'll probably have to do that because Illustrator keeps track of the order in which you create objects, and each one goes on top of the last one. We made the handle before we made the bristles so the handle will be behind the bristles.


按此在新窗口浏览图片


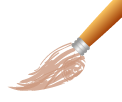
Step 23. Drag the rectangles over to the brush, and position them on the lower edge of the handle as shown. If your bristles seem too large, select them and with the selection tool (V) resize them a bit until they look in perspective to you. Select the handle, bristles and metal collar by dragging a marquee around them and then with them all selected, go to Object > Group, or type Cntl+G.

按此在新窗口浏览图片


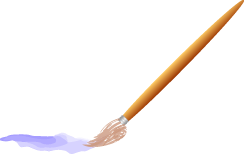
Step 24. That's it! The brush is done! If you want, choose the brush tool from the toolbox, and a brush stroke from the brush palette, and paint a wavy line to be the paint. Color it whatever color you wish.

按此在新窗口浏览图片


≡★ 免 责 声 明 ★≡

除本站原创外,本站所提供的所有教程均收集整理自网络,其版权归该教程直原始作者或原始出处所有!

除特别声明外,您可以在保持教程的完整和注明来源的前提下免费复制、转贴本站所提供的所有教程;但是,不可以盗链本站的图片!

除特别声明外,在未经许可的情况下您不得将本站所提供的任何教程(包括资源)用于商业用途;

如果确有需要,请自行与该教程的原始所有权者(即:原始作者或出处)联系,本站不提供相关服务;否则,由此而引发的一切后果由您自负!