Introduction
This Photoshop tutorial shows how to create a stone texture and how to use this same texture to create a stone wall. The same texture can also be used as to create a stone floor. The main goal of this tutorial is to teach you how to create a texture from scratch without using any photographs.
1. Create a texture
Open a new file in Photoshop. I selected a size of 600x400 because it’s easier for me to write a tutorial with this small size, but you can select any larger size you want.
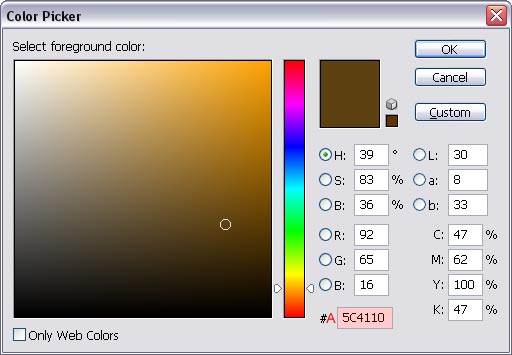
Click on the foreground color in the tool bar ...

...to open the Color Picker window.
Enter the value 5C4110 (dark brown) in the box marked with A and click on OK:
Select the Paint Bucket tool  in the tool bar and click once inside your document window to fill the background layer with this dark brown color.
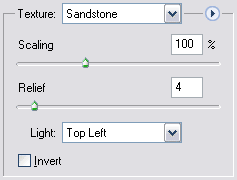
Select in the menu Filter / Texture / Texturizer... and use the following settings:
Click on the Create new fill or adjustment layer icon  at the bottom of your layers palette and select Solid Color...
Select the color value 8B7B5A (medium brown) and click on OK.
The layer mask attached to this layer should be active right now (double border). Click on it once if it doesn’t have this double border.
Press the letter D on your keyboard to make the fore- and background color black and white.
Select in the menu: Filter / Render / Clouds
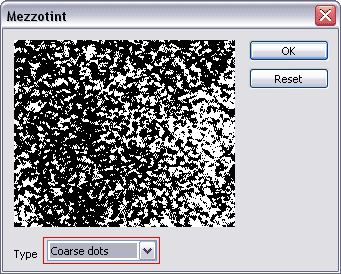
Select in the menu: Filter / Pixelate / Mezzotint...
In the Mezzotint window, select for Type Course dots and click OK:
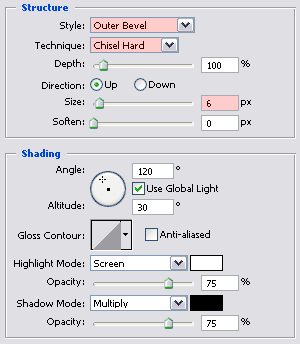
Click on the Add a layer style icon  at the bottom of your layers palette and select Bevel and Emboss...
The default values I changed (marked with red) are:
-
Style: Outer Bevel
-
Technique: Chisel Hard
-
Size: 6 px
Normally there shouldn’t be any need to change the other values as long as your Photoshop version is using the same default values (double check):

Click OK when you’re done.
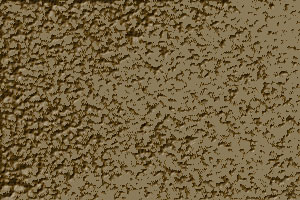
The resulting image should look something like this:

Important: The above image is only part of the original image. The reason why I’m not showing you the original image that we’re working on is because images like these (textures) tend to compress rather poor when saved with Jpeg. An image this size saved with average Jpeg compression is about 30KB. If I would have used the original image then it would have been 115KB. So in order to save bandwidth and to make pages load faster I will only show a small part of the original image.
We’re now going to repeat what we’ve done earlier: click on the Create new fill or adjustment layer icon  at the bottom of your layers palette and select Solid Color...
This time we select the color value DFC184 (beige/orange). Click on OK.
The layer mask attached to this layer should be active right now (double border). Click on it once if it doesn’t have this double border.
Press the letter D on your keyboard to make the fore- and background color black and white.
Select in the menu: Filter / Render / Clouds
Select in the menu: Filter / Pixelate / Mezzotint...
In the Mezzotint window, select for Type Course dots and click OK:


 in the tool bar and click once inside your document window to fill the background layer with this dark brown color.
 at the bottom of your layers palette and select Solid Color...
 at the bottom of your layers palette and select Bevel and Emboss...