Click once on the thumbnail of the Texture layer to make it the active layer; the layer is now the active layer and the eye icon  in front of this layer has returned, making the layer visible again.
Click on the Add layer mask icon  at the bottom of the layers palette to add a mask to this layer.
Hold down the Alt key (Option key on the Mac) and click once on the mask thumbail in the layers palette; the mask will now we completely visible in your document window, which turned white.
Select the pencil tool  in your tool bar. If you can’t see it; click on the Brush Tool
  in the layers palette and wait until a tiny window opens that contains both pencil and brush tool.
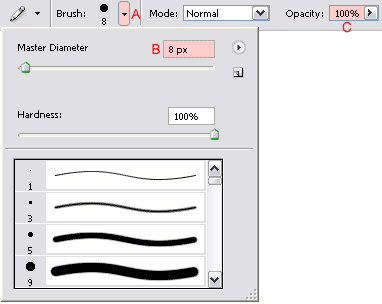
Click on the button marked with A in the option bar to open the brush preset picker window.
Select a Master Diameter of 8 (B) and make sure that the opacity is set too 100% (C) . Click again on the button marked with A to close the brush preset picker window:
Make sure that the foreground color is set to black (press the letter D on your keyboard to reset fore- and background color to black & white and/or press X to switch the fore -and background color if you have to):
Now we’re going to draw the following mask:
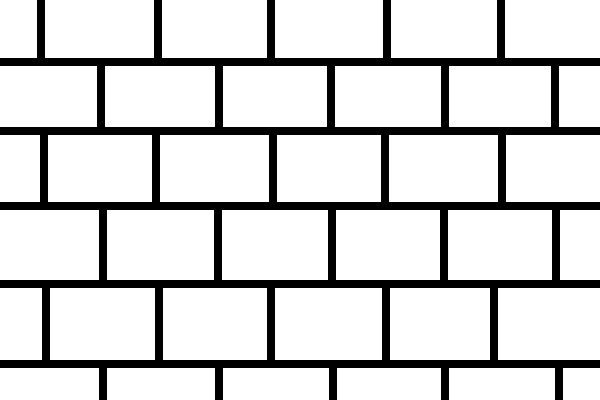
Start by drawing 5 (or more, depending on the size of the image you’re working on) horizontal lines.
To make sure that these lines are perfectly straight, you have to do the following; click once in the location where you want to start the line, hold down the shift key and then move your cursor to the other side of the image and release the shift key.
It’s recommended to place your cursor outside the canvas before you draw a line...
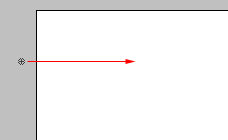
...to avoid that your line starts (or ends) like this (with a round edge):

To be able to start outside the canvas you need to zoom out a few times until you can see the canvas.
Zoom out by:
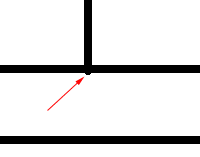
After you’re done drawing the horizontal lines, start drawing the vertical lines and again make sure that they are straight by holding down the shift key before moving the mouse cursor. Avoid crossing the horizontal lines like this:

Press Ctrl + Z (Command + Z on the Mac) if this happens to undo the stroke. Zoom in if you have a hard time to stop at the right moment.
When your done drawing the mask and with the layer mask still active, double click on the Zoom tool  in the toolbar to view the image at 100%, which is important if you want to have an accurate view on your image.
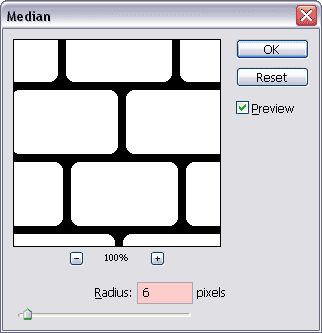
Go to the menu and select Filter / Noise / Median...
Enter a value of 6 for the Radius and click OK.

The purpose of this filter is give the stones of our wall rounded corners.
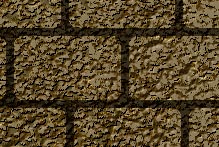
Now click on the thumbnail of our wall in the Texture layer to make our wall visible in our document window.
The wall will look something like this:


 in front of this layer has returned, making the layer visible again.
 at the bottom of the layers palette to add a mask to this layer.
 in your tool bar. If you can’t see it; click on the Brush Tool
  in the layers palette and wait until a tiny window opens that contains both pencil and brush tool.


 and clicking a few times inside the document window while holding down the Alt key (Option key on the Mac)