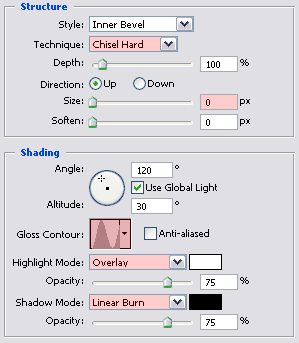
Click on the Add a layer style icon  at the bottom of your layers palette and select Bevel and Emboss...
The default values that I changed (marked with red) are:
Normally there shouldn’t be any need to change the other values as long as your Photoshop version is using the same default values (double check). Make sure that you don’t click on OK yet after you’ve entered the correct values.
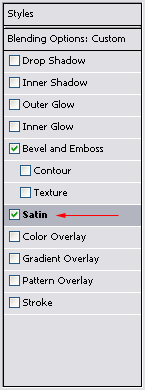
The next effect that we need to change is the Satin effect, so select it in your Layer Style window:
The default value that I changed (marked with red) is:
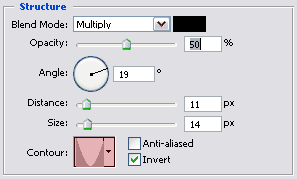
You can now click on OK to close the Layer Style window.
Change the blending mode of this current layer to Soft Light (A):
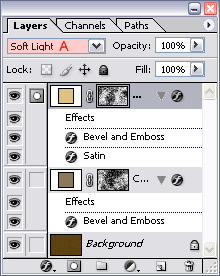
At this time we should have something like this:
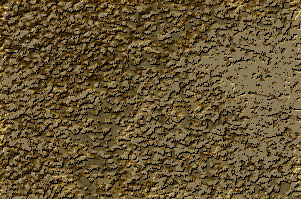
We have just created the texture that we’re going to use for our wall.
With the top layer being the active layer, add a new layer by clicking on the Create a new layer icon  at the bottom of your layers palette.
Press Ctrl + Alt + Shift + E (Command + Option + Shift + E on the Mac) to merge all visible layers on the current layer.
Double click on the layer’s name in the layers palette and rename it to Wall Background.
Duplicate this layer by clicking on its thumbnail and while holding down the mouse button dragging and dropping it on the Create a new layer icon  at the bottom of your layers palette:
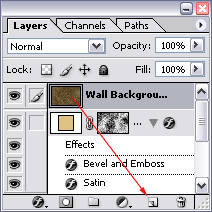
Double click on the layer’s name in the layers palette and rename it to Texture .
Click once on the eye icon  in front of this layer to make it invisible.
Click once on the thumbnail of the Wall Background layer to make it the active layer.
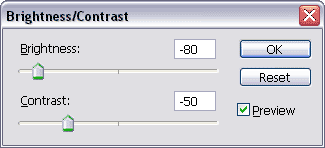
Click on the Create a new fill or adjustment layer icon  of the layers palette and select Brightness/Contrast...
Enter the value -80 for Brightness and the value -50 for Contrast and click on OK:


 at the bottom of your layers palette and select Bevel and Emboss...


 at the bottom of your layers palette.
 in front of this layer to make it invisible.
  of the layers palette and select Brightness/Contrast...