5. Add shadows and highlights
Click on the Create a New Layer  icon to create a new layer.
Double click on the layer’s name in the layers palette and rename it to Shadows and Highlights .
Turn this layer into a clipping layer by pressing Ctrl+G (Command + G on the Mac) or Alt + Ctrl + G (Option + Command + G on the Mac) if you’re using Photoshop CS2.
Set the blending mode of this layer to Overlay:
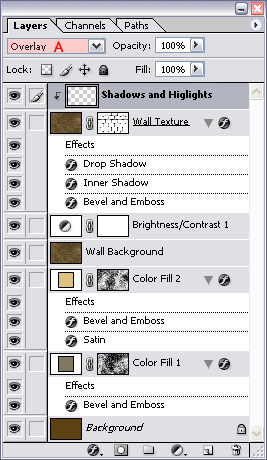
Note: the purpose of this clipping layer is to be able to paint shadows and highlights that will only affect the stones and not the spaces in between.
Press the letter D on your keyboard to set the fore- and background color to black and white: 
Select the Brush Tool  in the tool bar.
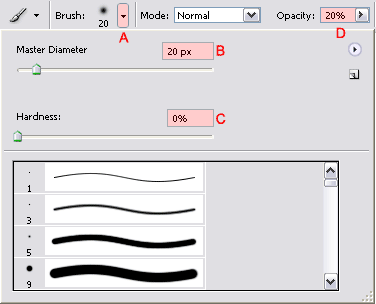
Click on the button marked with A in the option bar to open the brush preset picker window.
Select a Master Diameter of 20px (B), a Hardness of 0% (C) and make sure that the opacity is set to 20% (D) .
Click again on the button marked with A to close the brush preset picker window.

Select white as your foreground color (you can switch your fore- and background color by pressing the letter X).
Start painting all the highlights. While doing that keep in mind that the light is coming from the upper/left corner.
Now select black as your foreground color (switch your fore- and background color by pressing the letter X).
Start painting the shadow and again, keep in mind that the light is coming from the upper/left corner. Avoid to make some areas too dark, because you might end up with too much saturation in those locations.
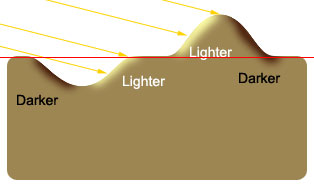
How are we going to paint those shadows and highlights? Look at this screenshot:

Imagine that the red line is the outer layer of the original stone (the front view, the side we’re looking at) and that the light (yellow arrows) is coming from the left. If we’re below the red line we have an area that is deeper; the shadows will be on the left side, the highlights on the right side. If we’re above the red line we have an area that is higher, but this time the highlights and shadows are reversed. Keep this in mind when you add your shadows and highlights.
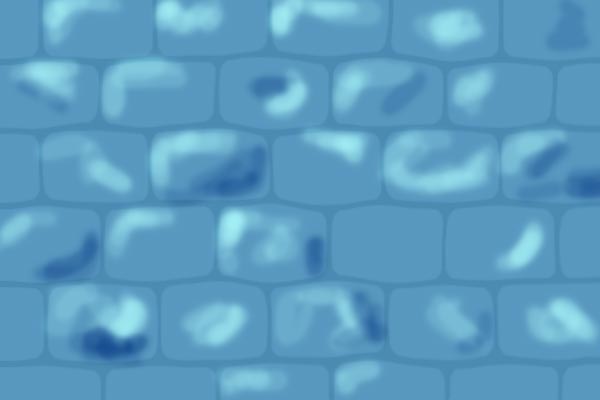
To give you an idea how to approach this, I’ve prepared an example for you. Note that this is not an actual screenshot of the current file we’re working on. This is just something I’ve put together for you to make things more clear.
Notice that since the light is coming from the upper/left, I’ve often (not always!) highlighted the upper/left corner of a stone. Just make sure that you add these shadows and highlights in a random way (avoid patterns).

You might consider to slightly blur the Shadows and Highlights layer when you’re done using Filter / Gaussian Blur... using a radius of about 4 pixels. You can also use the blur or smudge tool in combination with different brushes and sizes/opacity/hardness to improve the shadows and highlights. I haven’t done all this to keep the tutorial less complicated.
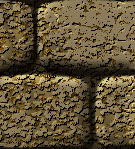
Move with your mouse over the next image to notice the difference:


 icon to create a new layer.

 in the tool bar.