3. Use layer styles to add depth to the stones
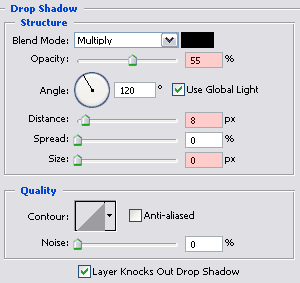
Click on the Add a layer style icon  at the bottom of your layers palette and select Drop Shadow ...
The default values that I changed (marked with red) are:
-
Opacity: 55%
-
Distance: 8 px
-
Size: 0 px
Normally there shouldn’t be any need to change the other values as long as your Photoshop version is using the same default values (double check). Make sure that you don’t click on OK yet after you’ve entered the correct values.

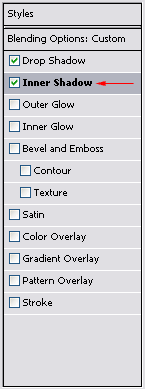
The next effect that we need to change is the Inner Shadow effect, so select it in your Layer Style window:

Important: make sure when you want to change any layer style that you click on its name (marked with the red arrow) and not inside the box in front of the name. The reason is that clicking on the name instead of the box opens the related window, clicking inside doesn’t close the current window and you risk changing the values of the wrong effect.
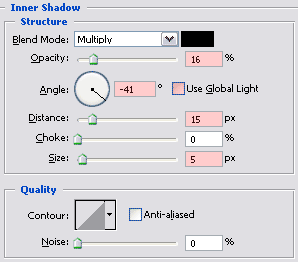
Important: make sure that the first thing you do now is turning off Use Global Light (see next screenshot) or you mess up the settings for the Drop Shadow effect.
The other default values that I changed (marked with red) are:
-
Opacity: 16%
-
Angle: -41
-
Distance: 15 px
-
Size: 5 px
Also the same story with the Drop Shadow effect; normally there shouldn’t be any need to change the other values as long as your Photoshop version is using the same default values (double check).

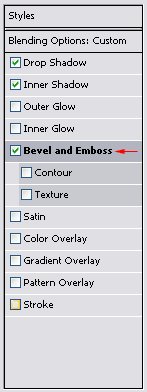
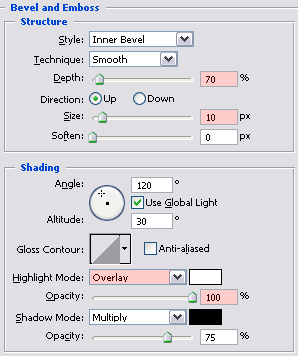
The last effect that we need to change is the Bevel and Emboss effect, so select it in your Layer Style window:

The default values that I changed (marked with red) are:

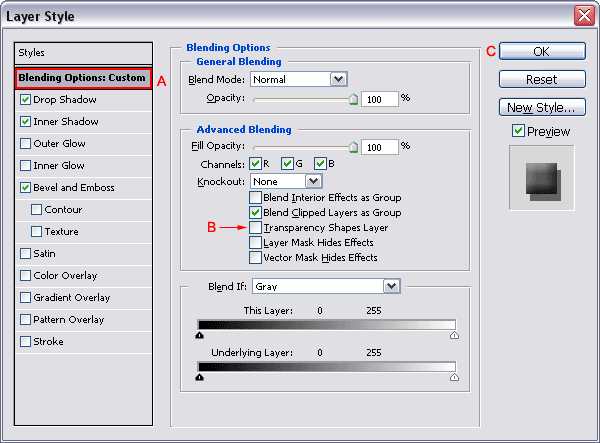
Continue by clicking on the area marked with red called Blending Options (A), empty the box that reads Transparency Shapes Layer (B) and click ok OK (C)

You might wonder why you had to uncheck the Transparency Shapes Layer option. To understand the reason look at the following screenshot that was taken of the bottom left corner of our document window with the Transparency Shapes Layer option selected:

Notice that the Bevel and Emboss effect was not only applied to the stones, but also to the edges of the layer, which is something we don’t want of course and we can solve this by unchecking this option.
Move with your mouse over the next image to notice the difference:


 at the bottom of your layers palette and select Drop Shadow ...